Table of Contents
First, you should follow the instructions at Installation.
After installing ArmarX, you are ready to continue with the quick start guide below.
In addition, you can find various tutorials at the Tutorials page.
Initializing the (Legacy) Robot Memory
Initially, the robot's memory needs to be filled with Prior Knowledge and snapshots containing an initial scene (more details on the memory concepts of ArmarX can be found here: MemoryX).
Getting the Memory Snapshot
The standard memory snapshot for starting with ArmarX is stored in the GitLab repository ArmarXDB. If you have used Axii, you can add ArmarXDB to your workspace by running:
This should clone the repository to $ARMARX_WORKSPACE/armarx/ArmarXDB.
Importing the Memory Snapshot
To import some predefined objects and a kitchen environment to the mongoDB database, run the following commands:
The Armar3 Simulation Scenario
The ArmarXSimulation package contains all you need to start up a simulated robot and environment. The simulator can be started with the Armar3Simulation scenario which is part of the Tutorials package and contains a simulated Armar3 robot and a kitchen environment. To start the simulated scenario run the following commands in a terminal.
Instead of giving just the name of the scenario, you can also specify the path to the *.scx file:
The simulator viewer should now pop up showing a view on the simulated scene, similar to the picture below.
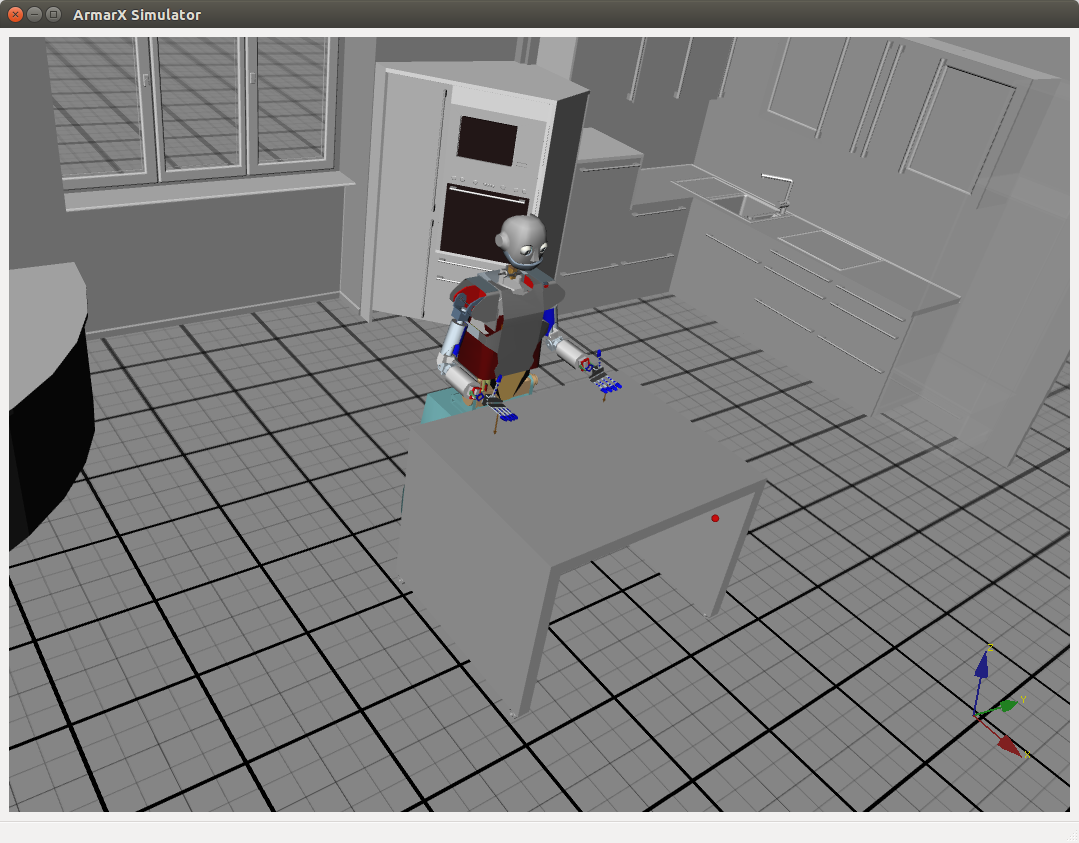
Keep the simulation running for now to be able to explore the GUIs introduced below.
The ArmarX Gui
The ArmarXGui provides several graphical user interfaces (GUIs) which can be used to send commands to the robot and to inspect the current state of the system. You can think of an ArmarXGui as a window in which different GUI widgets can be opened and rearranged.
An ArmarXGui window can be started with
The Use Case Selection will open up. For the start, just choose "open empty GUI".
You can open multiple instances of armarx gui and open different GUI plugins in each of them to interact with the same underlying system.
In the following, you will have a look at the basic widgets. You can open a GUI plugin in two ways:
- Navigate through the "Add Widget" menu.
- Use the "Widget Search" to search for a GUI widget, choose one from the suggestions and either press enter or click on the green "+" sign.

- Note
- GUI widgets can be added to ArmarXGui via GUI plugins. For the most part, the terms "GUI widget" and "GUI plugin" can be used interchangably, although they are technically a bit different.
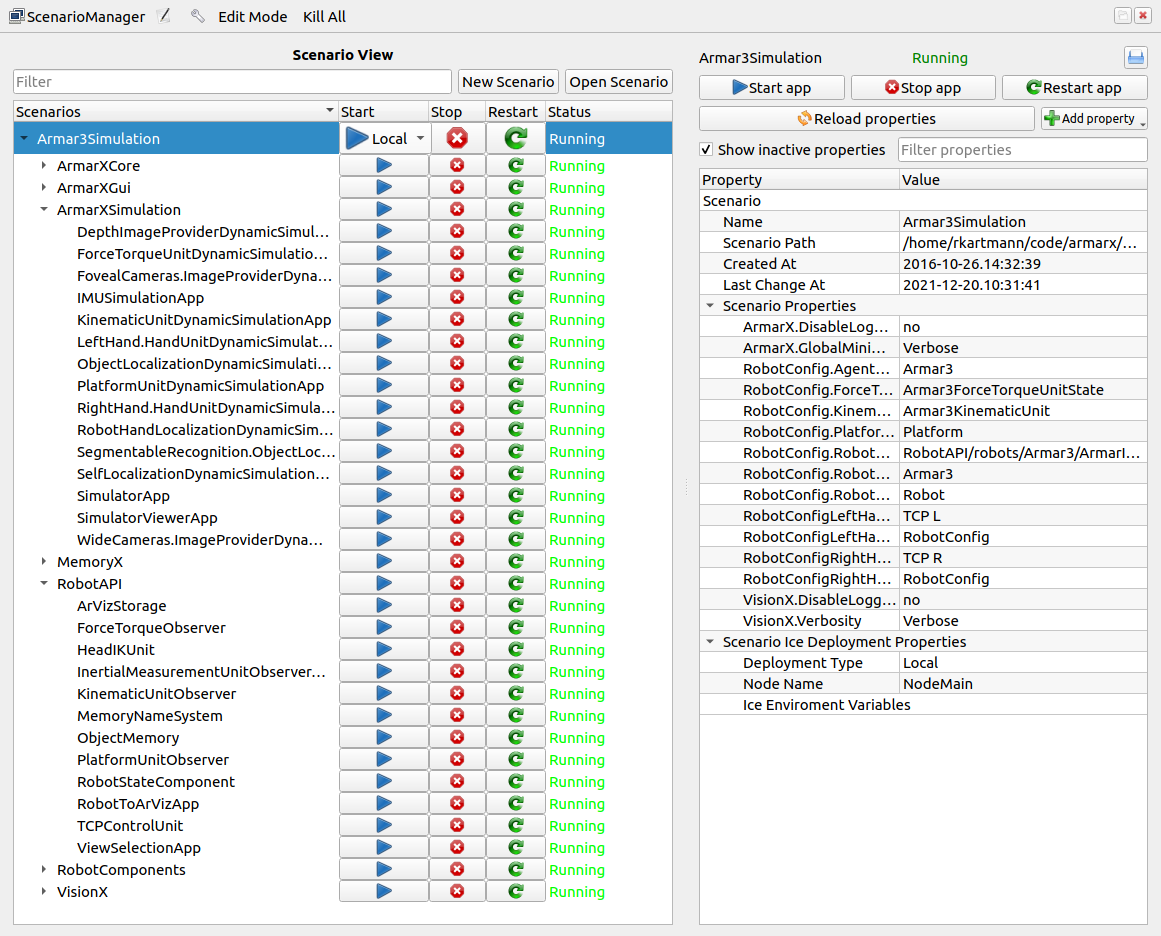
The Scenario Manager
The Meta > ScenarioManager can be configure and start scenarios. A scenario can parametrize, start and stop multiple components at once.
The System State GuiPlugin
The Meta > SystemStateMonitor can be used to inspect the dependencies and whether all components are running properly.

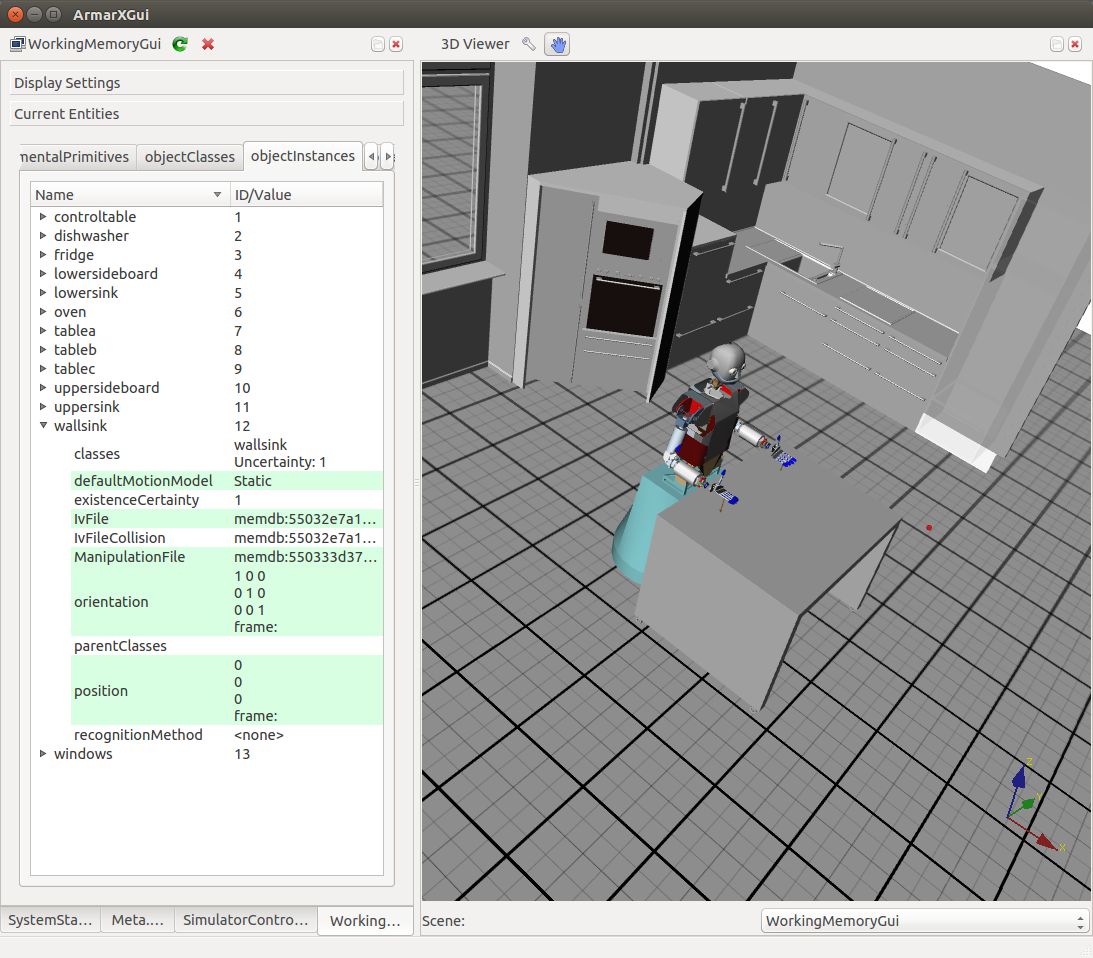
The (Legacy) Working Memory GuiPlugin
The MemoryX > WorkingMemoryGui shows the current content of the robot's Working Memory.
- Note
- When you open this plugin, two tabs will open. They can be arranged as shown below by dragging and dropping them.
The Simulator Control GuiPlugin
The ArmarXSimulator can be controlled with the SimulatorControlGuiPlugin. This plugin gives you a quick overview of your current robot setups.
In order to see any values, the ArmarXSimulation needs to be running.

Robot Control GuiPlugins
Commands can be sent to the robot via the RobotControl > KinematicUnitGui and the RobotControl > PlatformUnitGui:
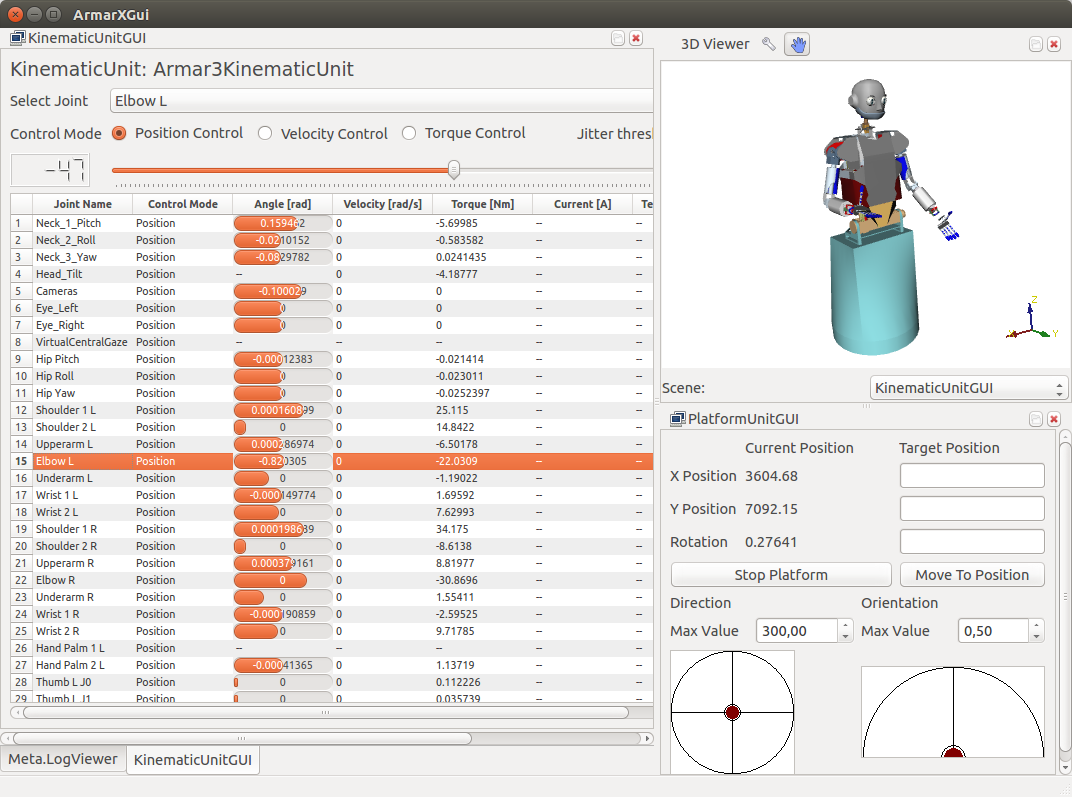
Select a joint by double-clicking on it and move it via slider at the top. You should see the changes of the joint position on your robot on the right. Go ahead and try it out with a few joints.
To move the platform, use the wheels or WASD (translation) and QE (rotation) (click inside the PlatformUnitGui to have it capture keyboard input).
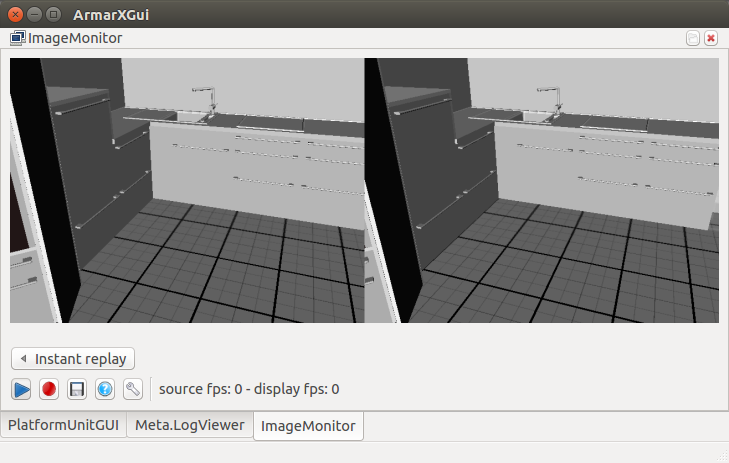
The ImageMonitor GuiPlugin
The simulated cameras and other image sources can be inspected with the VisionX > ImageMonitor gui plugin.
Choose an image source via the wrench icon at the bottom.
More Gui Plugins ...
... can be found at the GuiPlugins page.
Shutting Down ArmarX
ArmarX can be stopped with:
What's Next?
Next, you can continue with the tutorials at the Tutorials page.
