
|
|
Prerequisites: Write a Server and Client Communicating via RPC (C++)
If you want to check armarx threads documentation, you can find it here ArmarX Threads. This tutorial is self contained, which means that you don't need to go through the above component tutorial. But we suggest that you should read it to understand how components work in ArmarX.
After this tutorial you will understand how to write a multi-threaded program. We use a simple example which includes two clients and one server. The whole system contains a counter which is incremented continuously by one client called sender. The other client called receiver queries this value every few miliseconds. They communicate with each other through the server. In the meantime the server must accomplish a complicated task (we use sleep() to simulate the complicated task) and deliver the hash value of the current value given by the counter.
The idea is to firstly construct a client component and then instantiate two clients with different names: receiver and sender. The client component should be able to connect to the server component. Receiver and Sender can both manipulate the value of the counter with the methods implemented in server component. Hence, we should create an ice interface for server component to enable the communication.
Create a new package called MultiThreadingExample:
Now we create an ice interface for server component and name it MultiThreadingExampleServerInterface.ice. The interface contains all functions which the client component can access. The receiver should be able to get the value from the sever and the sender can manipulate the value, hence we create one pair of getter-setter functions.
Now we need to change some CMakeLists in order to correctly build everything.
Now we have set up all links. We should be able to build the whole project without errors. Build the project with 'make' under the 'build' folder. If you encounter any errors, ensure that you strictly follow the above steps.
Until now, we have not implemented any functions yet. This is our next step. In this step, you have a lot of choices. Feel free to construct your own multi-threading program. The most interesting thing in ArmarX package is that we have already two different objects, runningtask (Using running tasks) and periodictask (Using periodic tasks), implemented. You can just use both tools to create your own thread. As the names show, the running task can only be executed one times, while the periodic task is always called after a certain time interval until you stop the tasks.
Remember to include the server interface into your header files. Ice will automatically generate a header file for our server interface. We need to add the following 'include' statements into both components' header files.
Also, make sure the MultiThreadingExampleServerComponent inherits from the MultiThreadingExampleServerInterface:
Also implement the getter and setter methods by adding two std::string member inputValue, outputValue to the header and by accessing getting/setting them with said methods.
If you want to use running task or periodic task tools, you also need to include them.
We implement a running task in the server component. Before that, we should set some private variable members for the server. The server should get input value (inputValue) from the sender and deliver the manipulated value (outputValue). At the same time it must have a 'complicated'(sleep()) running task (serverTask), in which the hash function of the input value is also calculated. You can initialize a running task using the following code:
The second argument of the constructor defines a function which is called when the task starts running. Furthermore, we need two locks separately for setting and sending values.
Then we can implement our running task in server.
The above codes realize the functionality metioned before. Notice that we use boost scoped_lock to lock the resources we use. Boost scoped lock will release lock once it meets the end of the blocks. We avoid placing 'sleep' command into the scope of lock, because if it represents a very complicated task, we may never see any change of the values.
We can put the initialization of the running task together with the start of the task into the OnConnectComponent().
The client component must be able to connect the server component, which means that we should firstly define properties for server component.
We add another command line in order to tell the difference between sender and receiver. At the same time, we need to get access to these properties under the function onInitComponent():
where 'isSender' is a member of the client component. We should add the other member called 'counter' into the component, then the sender can increment the counter in its periodic task. The final step is to define a periodic task and create the corresponding function. We add the following codes into OnConnectComponent():
where 'serverPrx' is used to receive the information from server component, hence you can use it to call all the functions defined in the ice interface (MultiThreadingExampleServerInterface). 'clientTask' is defined as a periodic task, which calles a callback function called 'periodicTaskCallback' every 700 miliseconds.
Our callback function looks like the following:
If the client is the sender, then it will increment the counter and send some information to the server. If the client is the receiver, then it will get the information from the server.
Don't forget stopping both running task and periodic task when disconnecting the components.
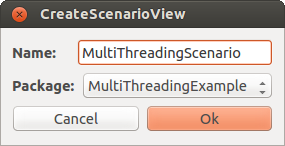
At the end of the tutorial, we need to create a scenario and see the result of our multi-threading program. You can use the ArmarX GUI and the included scenario manager (Add Widget -> Meta -> ScenarioManager). First register the package MultiThreadingExample which we created earlier (Configure button). Then you should be able to create a scenario in this package.
After creating the scenario add our applications. We need one MultiThreadingExampleServerApp and two instances of the MultiThreadingExampleClientApp (sender and receiver).
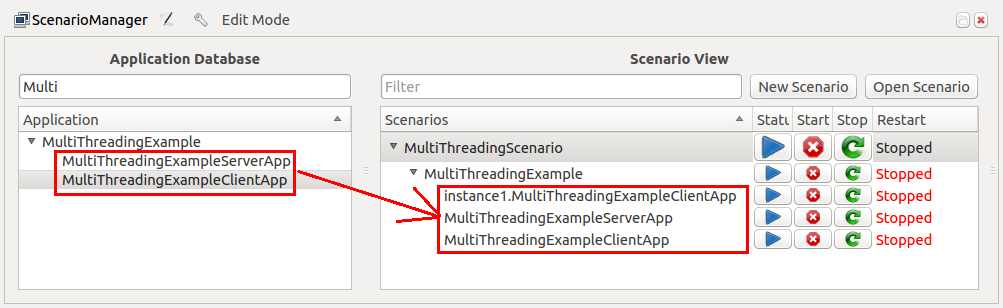
Before running the scenario the clients need to be configured so that one acts as a sender and the other one as a receiver. Set the following properties for the sender using the scenario manager:
Set the corresponding for the receiver client:
Finally we can start the scenario and see if the results are correct by pressing the start button in the scenario manager. The log messages can be inspected using the LogViewer.
 1.8.17