This tutorial will expand upon the previous tutorial by adding a new scenario with a kinematic simulation. This will allow you to show and move your robot's joints.
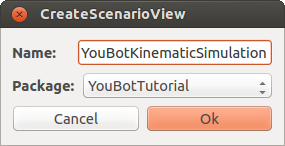
We start off by creating a new scenario with scenario manager (ArmarXGui: Add Widger -> Meta -> ScenarioManager). Make sure to select the select the package that you created in the first tutorial.
Add the applications KinematicUnitSimulation and RobotStateComponent to the newly created scenario using the application database. Now you can configure these applications by setting the following properties:
| Application | Properties to set |
| KinematicUnitSimulation | ArmarX.KinematicUnitSimulation.RobotFileName = YouBotTutorial/YouBot.xml ArmarX.KinematicUnitSimulation.RobotNodeSetName = Joints_Revolute |
| RobotStateComponent | ArmarX.RobotStateComponent.AgentName = youBot ArmarX.RobotStateComponent.RobotFileName = YouBotTutorial/YouBot.xml ArmarX.RobotStateComponent.RobotNodeSetName = Joints_Revolute |
- Note
- Again, make sure to replace all references to the YouBot.xml file with your robot definition file in the simox format
- You'll also note that we use the RobotNodeSetName 'Joints_Revolute' here. This is the nodeset we will manipulate via the GUI shortly. Adjust if necessary.
To continue, start the scenario using the ArmarXGui or the CLI:
${ArmarXCore_DIR}/bin/armarx scenario start YouBotKinematicSimulation -p YouBotTutorial
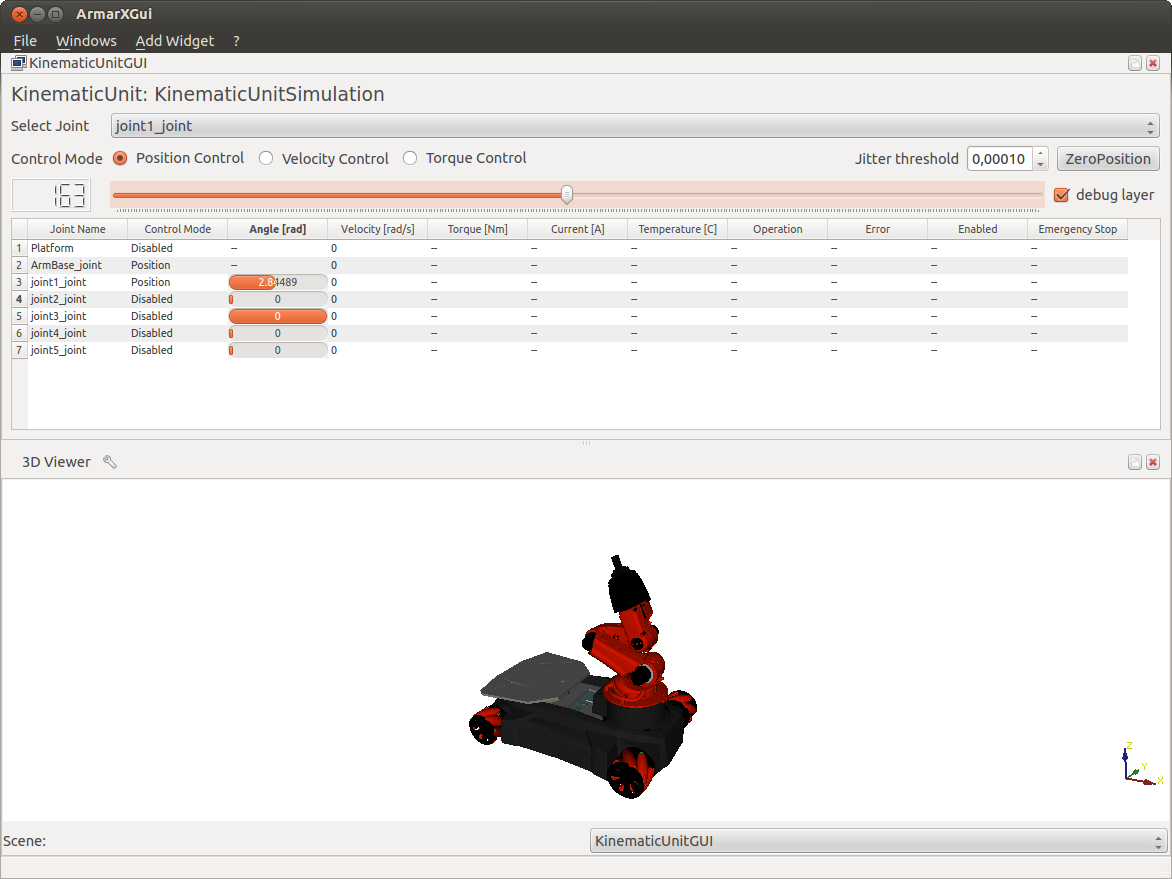
and add the KinematicSimulation widget via Add Widget -> RobotControl -> KinematicUnitGUI. You should see the widget settings:
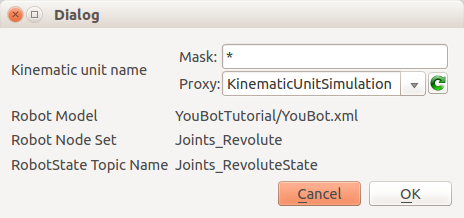
You'll need to adjust the 'Robot model filepath' to use your robot, and the 'Robot nodeset name' to the nodeset you want to use.
- Note
- It may take a few seconds before the kinematic unit proxy connects to the widget.
After pressing OK, you should be able to see the actual widget with a 3D view of your robot. You can now also select and move the robot's joints with position or velocity control.