This tutorial will guide you through adding new objects to the database for the robot to interact with. It is highly recommended you've done the previous tutorial(s). Start off by creating a new database for our robot to use. In this tutorial, the assumed name will be "youbotdb". We'll also need some objects to add to the prior knowledge. The used objects will be Table.xml and LegoXWing.xml found in Simox (VirtualRobot/data/objects). To follow the tutorial, copy all needed files to our tutorial project:
cd ${RobotPackage_DIR}/data/YouBotTutorial
mkdir -p objects/iv
cp ${Simox_DIR}/VirtualRobot/data/objects/Table.xml objects
cp ${Simox_DIR}/VirtualRobot/data/objects/iv/table.iv objects/iv
cp ${Simox_DIR}/VirtualRobot/data/objects/LegoXWing.xml objects
cp ${Simox_DIR}/VirtualRobot/data/objects/iv/lego_xwing.iv objects/iv
cp ${Simox_DIR}/VirtualRobot/data/objects/iv/lego_xwing_col.iv objects/iv
You will also need to create the "youbotdb" database in MongoDB. To achieve that open the MongoDB command line interface.
Then you can create a new database using the following commands:
- Note
- It is important to atleast insert one dummy entry. Otherwise MongoDB will not create a new database.
Next, we'll want to save a snapshot of the working memory after modifying it, which we'll need LongtermMemory for. Add the application to the YouBotSimulation scenario using the application database.
Since we'll be modifying various memories and running the simulation in parallel can produce adverse effects, you should only start the four applications which are part of MemoryX. You can do that by pressing the start button next to the MemoryX group in the scenario view.
- Note
- If you think you'll modify the memories a lot in the future, it might be worth it to create a scenario that just starts the four memory components.
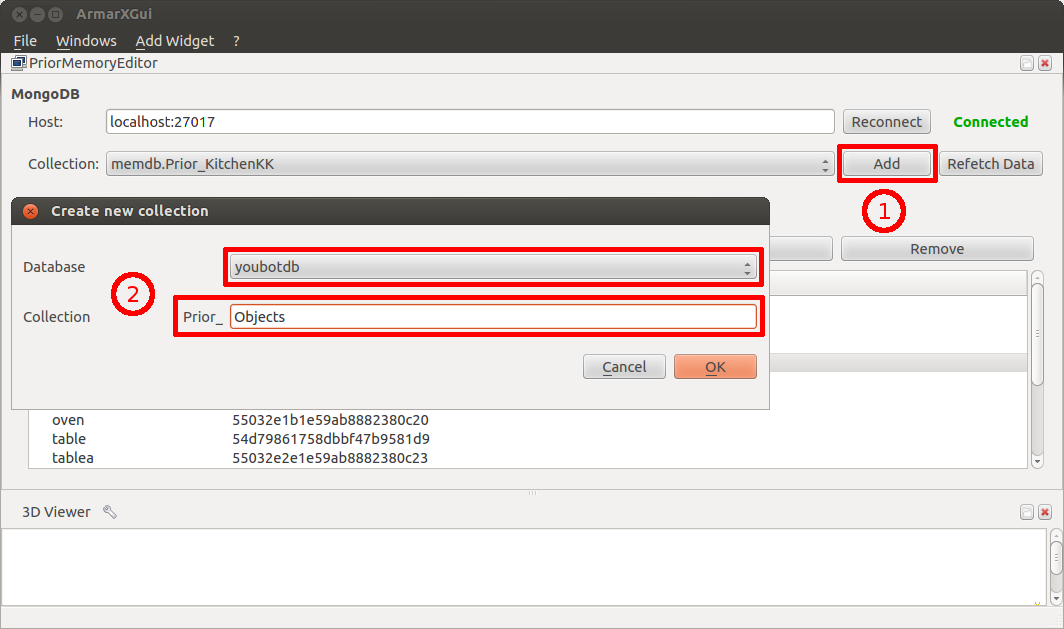
Afterwards add the PriorKnowledge editor (Add Widget -> MemoryX -> PriorMemoryEditor). Then, add a new collection to our youbotdb named "Prior_Objects":
Now we need to adjust LongtermMemory to save new snapshots to our youbotdb, and adjust PriorKnowledge to use our new collection.
| Application | Properties to set |
| PriorKnowledge | MemoryX.PriorKnowledge.ClassCollections = youbotdb.Prior_Objects |
| LongtermMemory | MemoryX.LongtermMemory.DatabaseName = youbotdb |
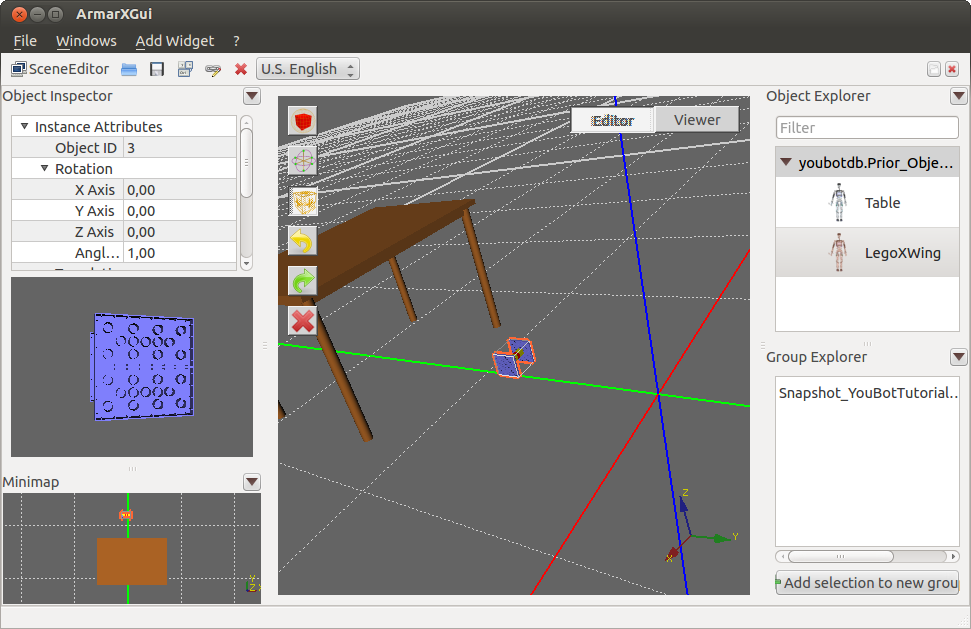
You can now add the objects to the prior knowledge under the names Table and LegoXWing, respectively. Since we've only added the classes to the robot's prior knowledge, we also need to add some instances for the robot to interact with. Use the Scene Editor for that (Add Widget -> MemoryX -> SceneEditor). For example, if your robot is capable of grasping objects from the table, you could add the table and set LegoXWing on top of it. Since the youBot is a bit smaller, we'll just set the LegoXWing next to where the youBot will appear, i.e. close to the origin:
Once you're done editing the scene, save the current working memory state as a snapshot in the SceneEditor. In our example, the snapshot is named "Snapshot_YouBotTutorialScene" After you're done, close the SceneEditor, and uncomment the disabled simulation components to re-enabled them. We still have to specify that the snapshot should always be loaded when the scenario is started (alternatively, you can load it manually in SnapshotControl). In the SimulatorApp set the following property (replace with whatever you named your snapshot):
ArmarX.Simulator.LongtermMemory.SnapshotName = "Snapshot_YouBotTutorialScene"
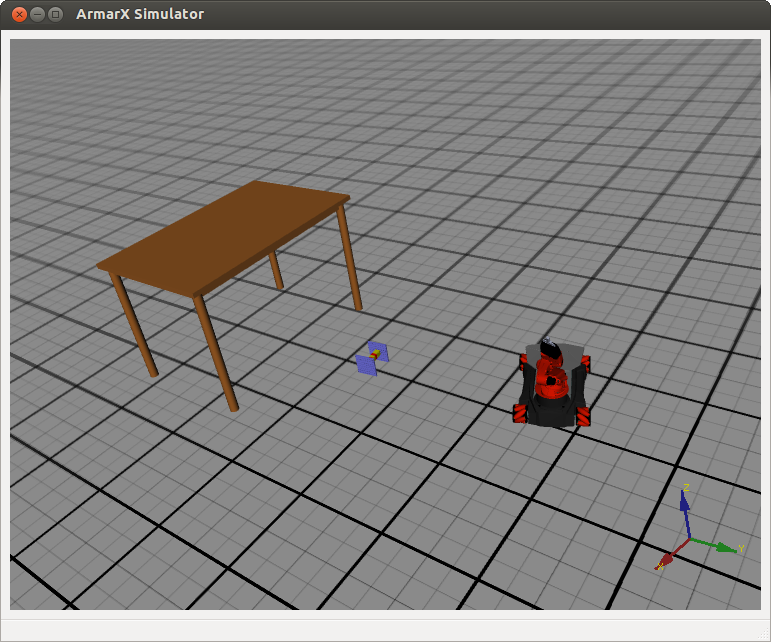
Finally, run the scenario. The objects should be in a similar setup to what you did with the SceneEditor: