This tutorial will guide you through cloning existing statecharts from RobotSkillTemplates to adjust them to our robot. It is highly recommended you have done the previous tutorial.
Before we start, we'll need to make sure that our package is known to other ArmarX packages, which is especially important for automated code generation. There should be an existing configuration file ~/.armarx/default.cfg . Open it with a text editor and look for the variable ArmarX.DefaultPackages. It should look similar to this:
ArmarX.DefaultPackages=ArmarXCore,ArmarXGui,MemoryX,RobotAPI,RobotComponents,ArmarXSimulation,VisionX,SpeechX,Armar3,Armar4
Edit it to also consider our package (here: "YouBotTutorial"):
ArmarX.DefaultPackages=ArmarXCore,ArmarXGui,MemoryX,RobotAPI,RobotComponents,ArmarXSimulation,VisionX,SpeechX,Armar3,Armar4,YouBotTutorial
Next, we'll define our statechart profiles, which can be used to define different parameter values for different situations. Let's say we wanted to run our statecharts in simulation and on the real robot later. Assuming that we'd need different parameter values for even a few parameters, we'd need to define two statechart profiles "YouBotSimulation" and "YouBotReal".
To do that, create the file ${RobotPackage_DIR}/data/YouBotTutorial/StatechartProfiles-YouBotTutorial.xml with the following content:
<?xml version="1.0" encoding="utf-8"?>
<Profiles>
        <Profile name="YouBotBase">
                <Package name="YouBotTutorial" />
                <Profile name="YouBotSimulation" />
                <Profile name="YouBotReal" />
        </Profile>
</Profiles>
- Note
- The xml file's name has to end with the package name. Adjust accordingly.
We can now proceed to clone the RobotSkillTemplates we need.
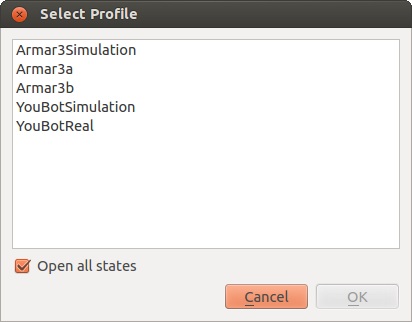
To proceed, restart the ArmarXGui if it was running already and open the StatechartEditor (Add Widget -> Statecharts -> StatechartEditor). You should be prompted by the profile selector, where you should see the Armar profiles as well as our YouBot profiles:
Since we'll be using Armar's statecharts as our clone source, select any Armar profile and make sure "Open all states" is checked. After confirming, you should see all available robot skills to clone from. Let's say we wanted to implement grasping for our robot, so we'd want the "GraspObjectGroup". Right-click on it and select "Clone Group". Cloning a group means that not only the group itself is cloned, but also its dependencies. The Clone Group Dialog requires you to specify the target package dir as well as a name prefix that is applied to the cloned statecharts. Using our package as the target and "YouBot" as the prefix should look like this:

- Note
- you can also individually rename the new statechart groups by double-clicking on their names in the "Cloned StatechartGroup" column.
Once you're done, confirm the cloning and wait a bit for it to finish (check the terminal where you started ArmarXGui to see if any errors occured). The cloning operation generated the file ${RobotPackage_DIR}/data/YouBotTutorial/StatechartGroupMapping-YouBotTutorial.xml and cloned the statechart groups to ${RobotPackage_DIR}/source/YouBotTutorial/statecharts.
The mapping xml file is basically there to tell which group was cloned from which original group, which is especially important if you wanted to clone other groups part of whose dependencies were cloned earlier.
- Note
- if you, for some reason, want to revert the cloning, you'll have to adjust/delete the StatechartGroupMapping file in addition to deleting the cloned statecharts.
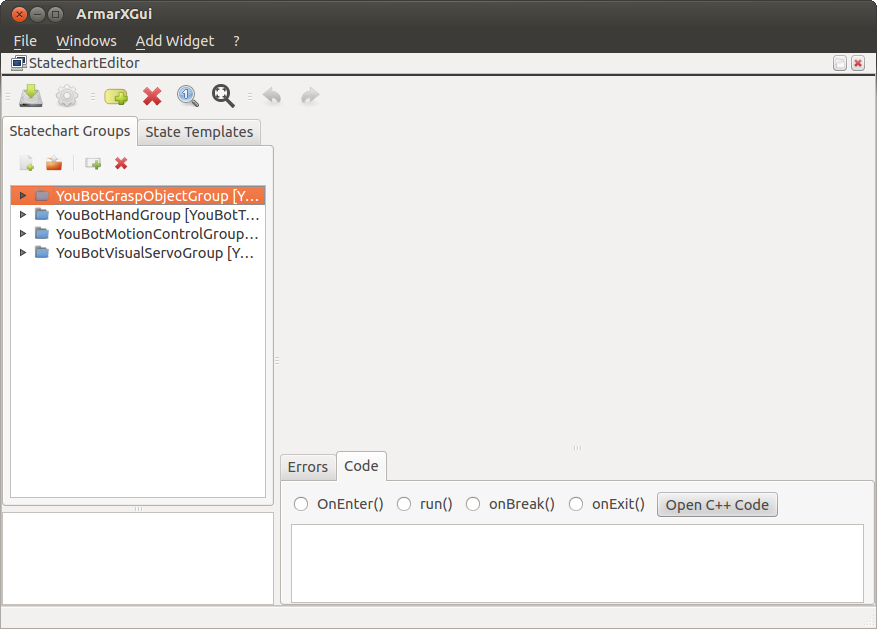
To confirm the results, look for the new statecharts in the statechart selection window. Alternatively, close the StatechartEditor and reopen it. This time, select any of the YouBot profiles. You should now only see the cloned statecharts:
As a final test, run make in ${RobotPackage_DIR}/build to confirm everything works. If everything was built successfully, you're now ready to dive in and implement the actual grasping.
