Creating the scenario
To calibrate the stereo setup, a scenario is needed which processes the image data in a calibration component
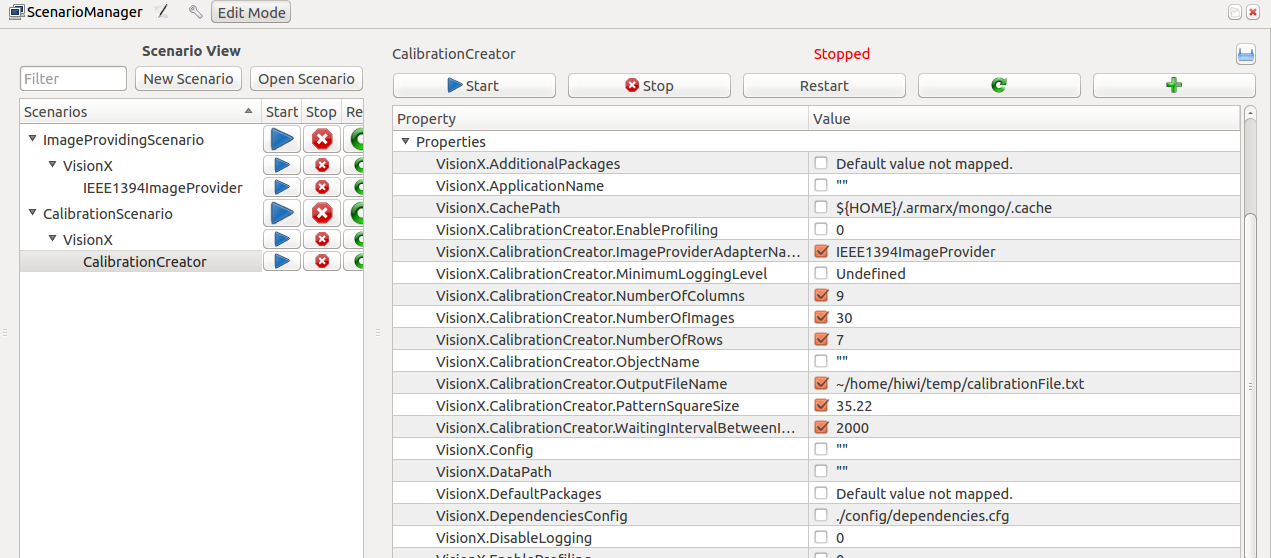
In the ScenarioManager, create a new scenario and add the component called CalibrationCreator. The scenario from the how to on Setting up the seperated Armar4 head will still be used to provide the images.
- Note
- This how to is written for the Armar4 head. If you are using a different robot, be sure to adjust the according paths and packages.
Configuring the scenario
The configuration of the calibration component has to be edited:
Set the ImageProviderAdapterName to IEEE1394ImageProvider and enter a valid file path as the OutputFileName. The calibration is calculated from images of a black and white checkerboard with differing orientations in space. Depending on the calibration checkerboard you are using, the number of rows and columns, as well as the length of a square have to be set. For the usual H2T checkerboard (printed on A3), these values would be 7, 9 and 35.22 respectively.
- Note
- You should put the length of a square in the measuring unit you want to use later, in this case mm
You can increase the NumberOfImages value to calibrate with more data and increase the WaitingIntervalBetweenImages to give you more time to change the poses between captures (default is only .5 seconds).

Calibration
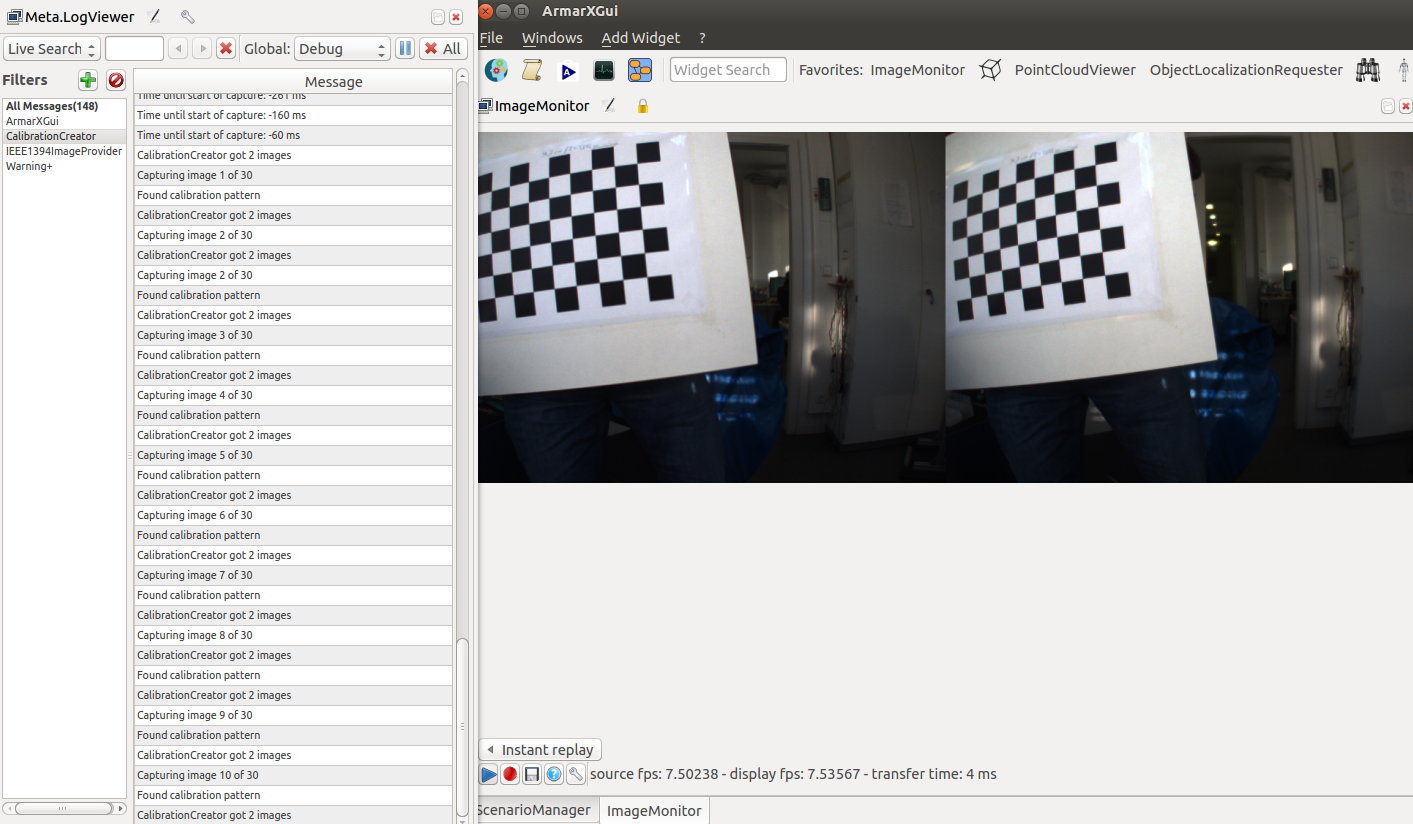
To calibrate, make sure that the image providing scenario is still running on the head pc (you can check with the ImageMonitor).Then start the new scenario from the second pc in the ScenarioManager. The calibration snapshots are taken after a 10 second waiting time, in which the ImageMonitor widget should be arranged to be visible in order to see the images you are capturing during the calibration. Make sure to include many differing poses of the checkerboard in the calibration images.
The calibration parameters should be stored after a short calculation in the location specified as the OutputFileName and can be used for Calculating point clouds with stereo vision.

