Starting the head
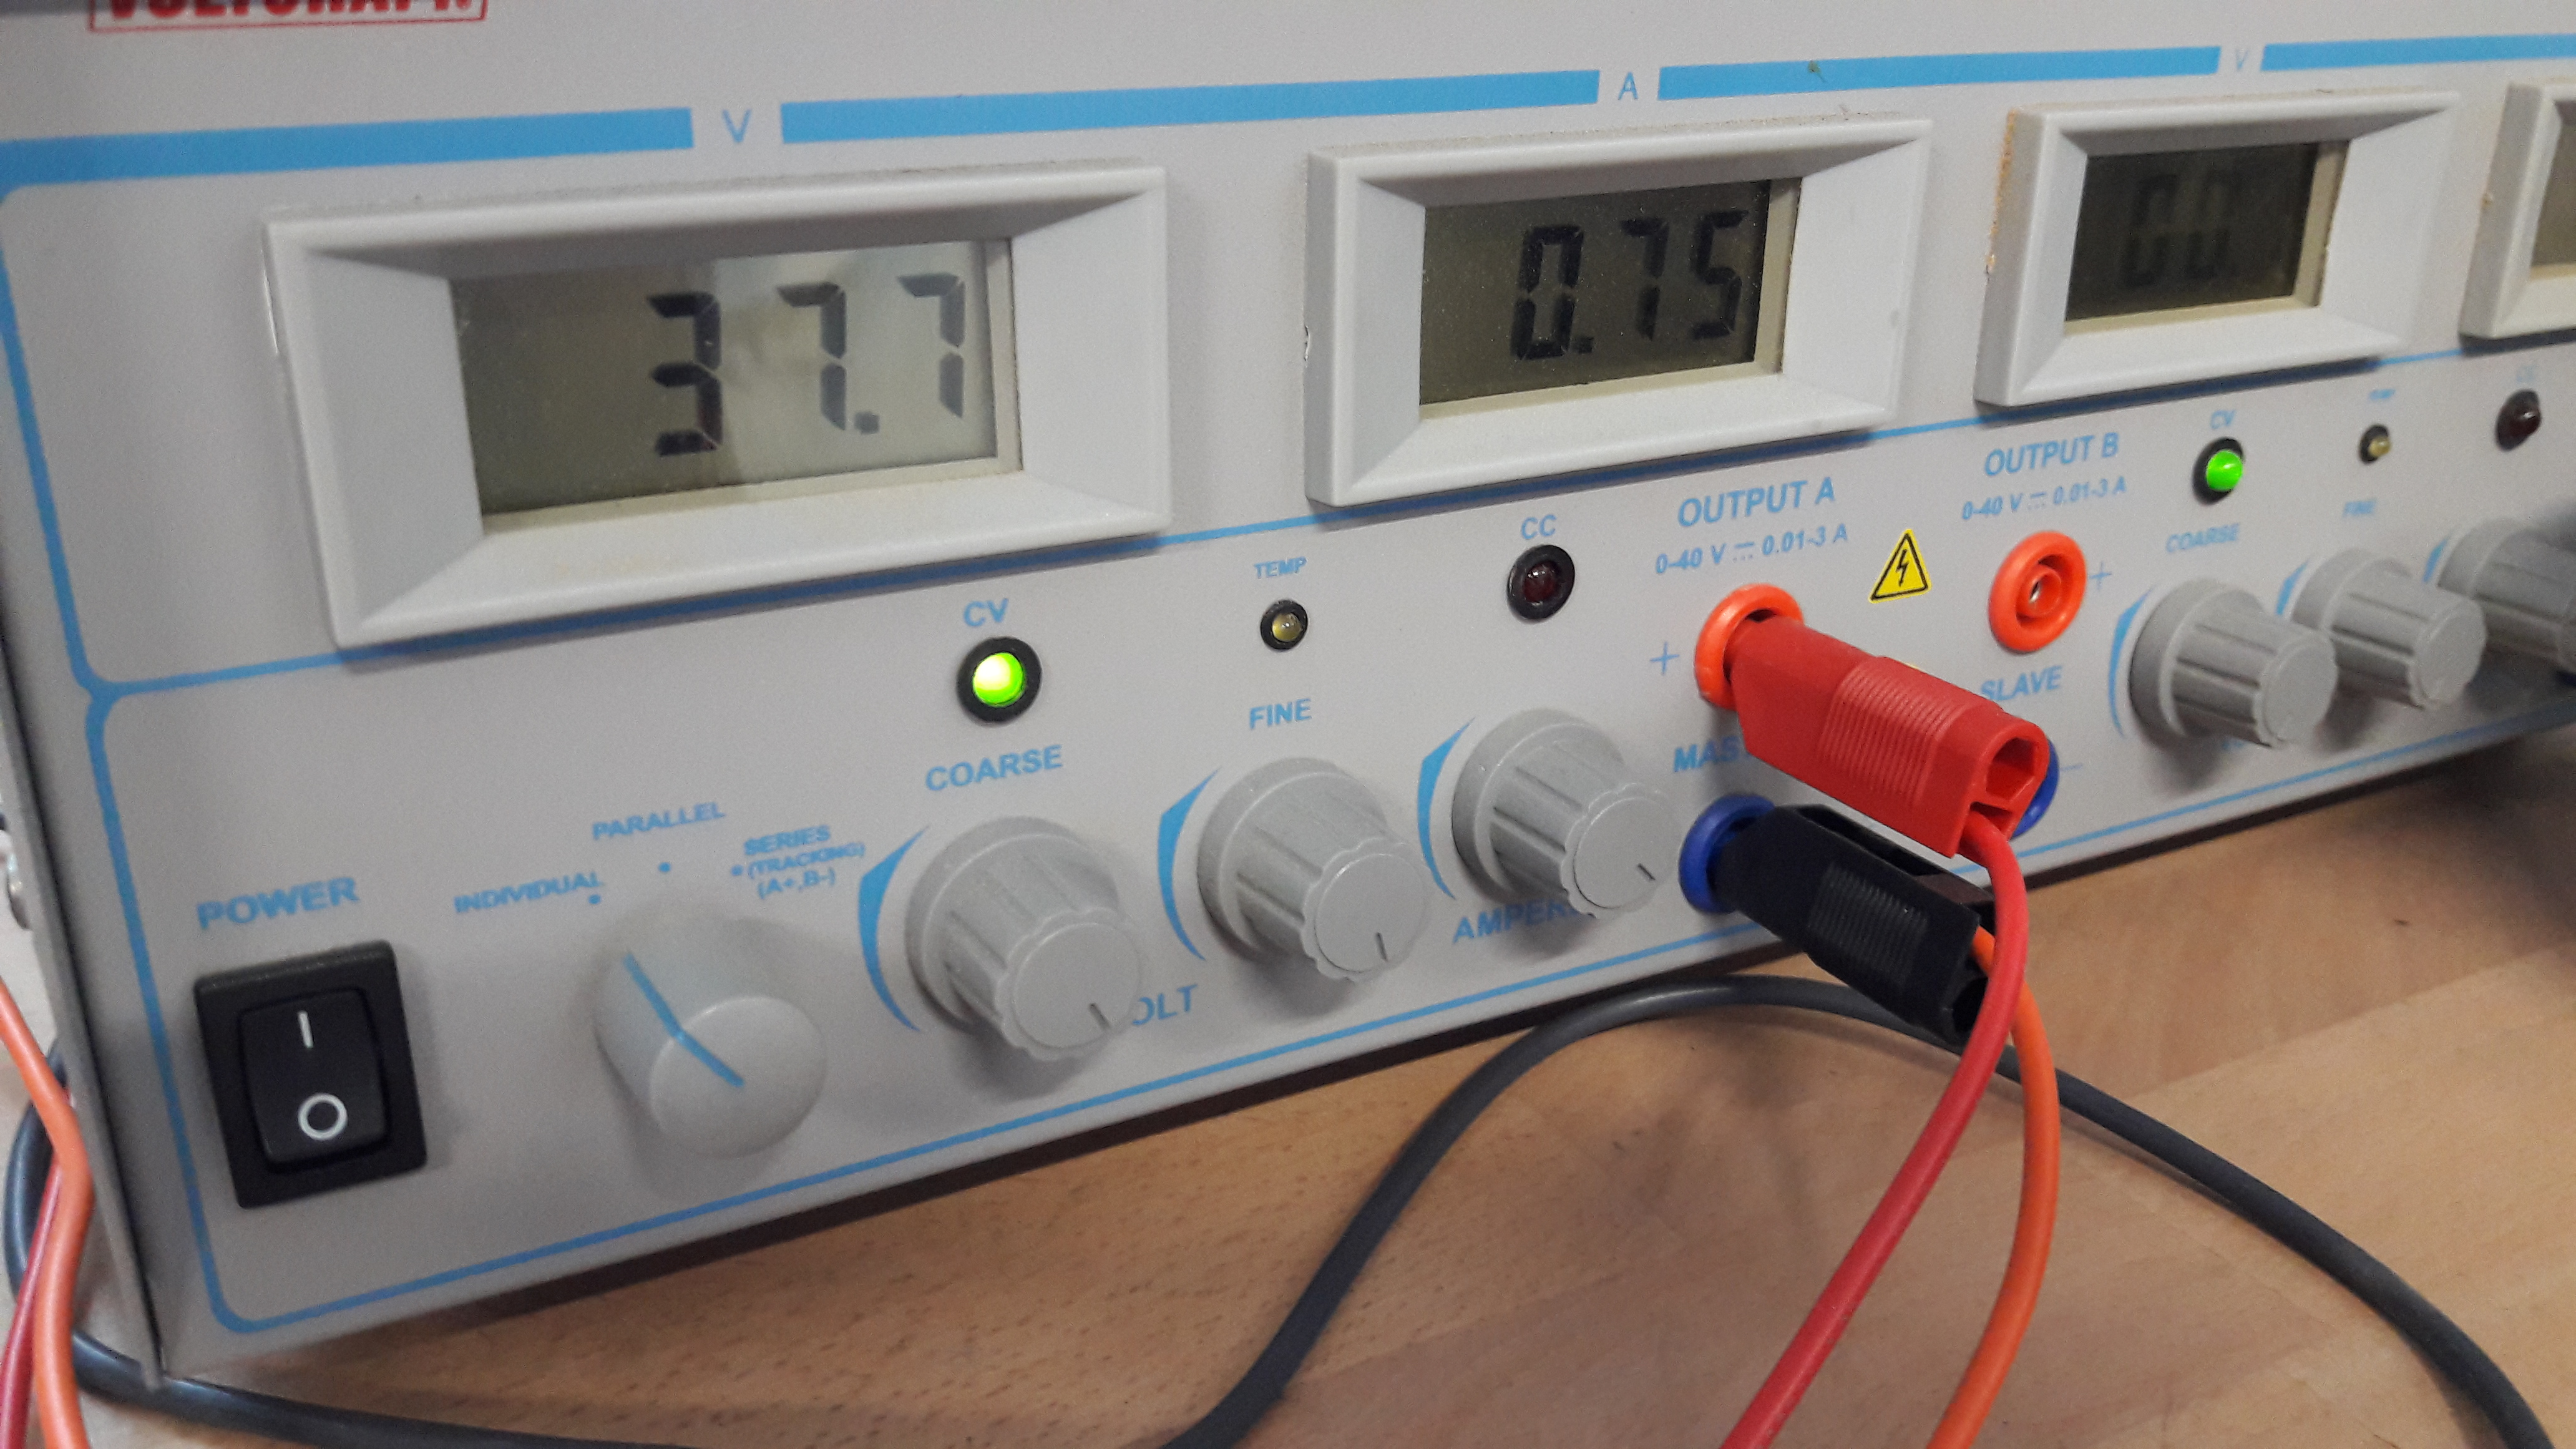
Start off by checking the connections between the power supply and the head. Normally the colors of the jacks should match the color of the outlet.
The coarse and fine voltage settings should be turned to the maximum, while the ampere knob should be turned up to around 90%. If everything matches these condition, start the head pc by flipping the power button.
Connecting the head and another pc
Connect from the second pc to the head with
Create a new ArmarX profile called armar4-head with
Replace the content of the default.cfg located in ~/.armarx/profiles/armar4-head/ with
- Note
- 141.3.88.106 is the IP address of the armar4 head pc
You should now be able to start armarx from the head with
When you switch to the same armarx profile on the pc in the network, armarx status should show that ice is already running on the head:
With this setup it is possible to start scenarios etc. on the head pc and start the armarx gui on the other pc and look at the results from the scenarios in that gui. If you want to use any scenarios which involve the MemoryX components you will probably need to start the memory on the head as well:
- Note
- When the memory is started from the head, the IP address of the head (141.3.88.106) needs to be set as the MongoHost in the CommonStorage application, as also listed in the how to on Localizing textured objects with Armar4.
Retrieving the camera images from the head
Be sure to build the Armar4 package and all dependencies on your pc.
- Note
- This how to is written for the Armar4 head. If you are using a different robot, be sure to adjust the according paths and packages.
To retrieve the images of the Armar4 head cameras, a scenario needs to be executed on the head. Start the ArmarXGui on the second computer with
and start the ScenarioManager. Create a new scenario under the Armar4 package and add the IEEE1394ImageProvider to it. In its configuration, set the value of CameraUIDs to
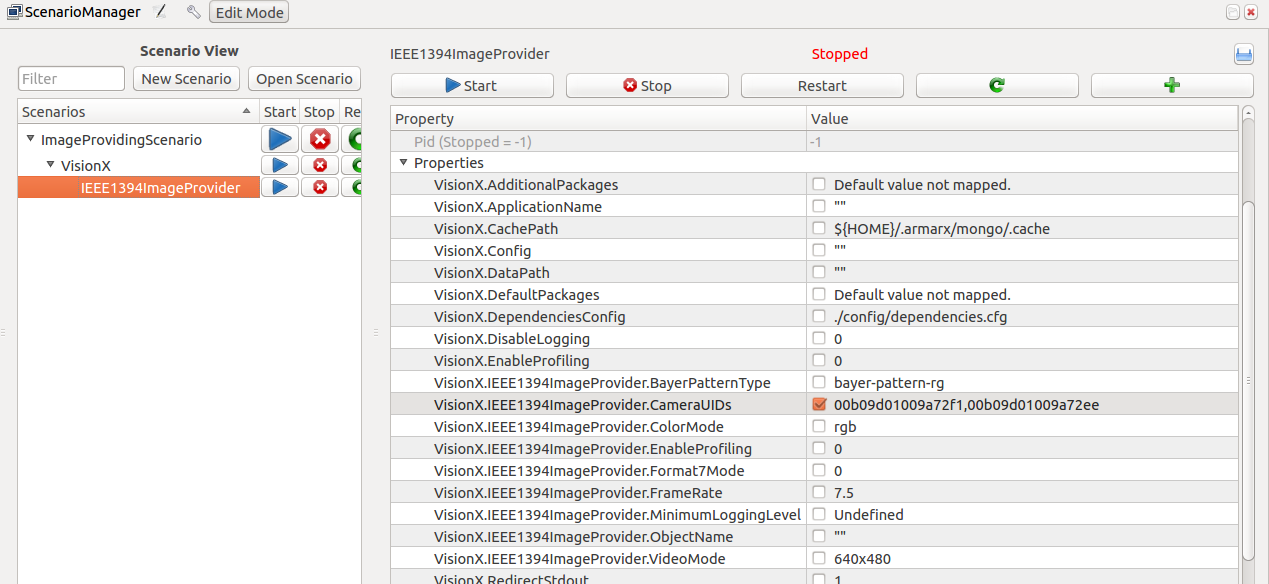
This component accesses and provides the camera images of the two wide view cameras of the head. Run the scenario on the armar4 head computer with the line
- Note
- Remember to stop the scenario withwhen you want to edit it. If you do the how to on Calibrating the cameras of the Armar4 head after this one, you can keep it running.armarx scenario stop <ScenarioName>
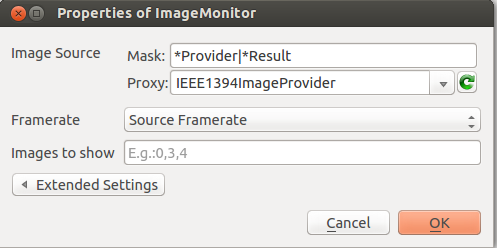
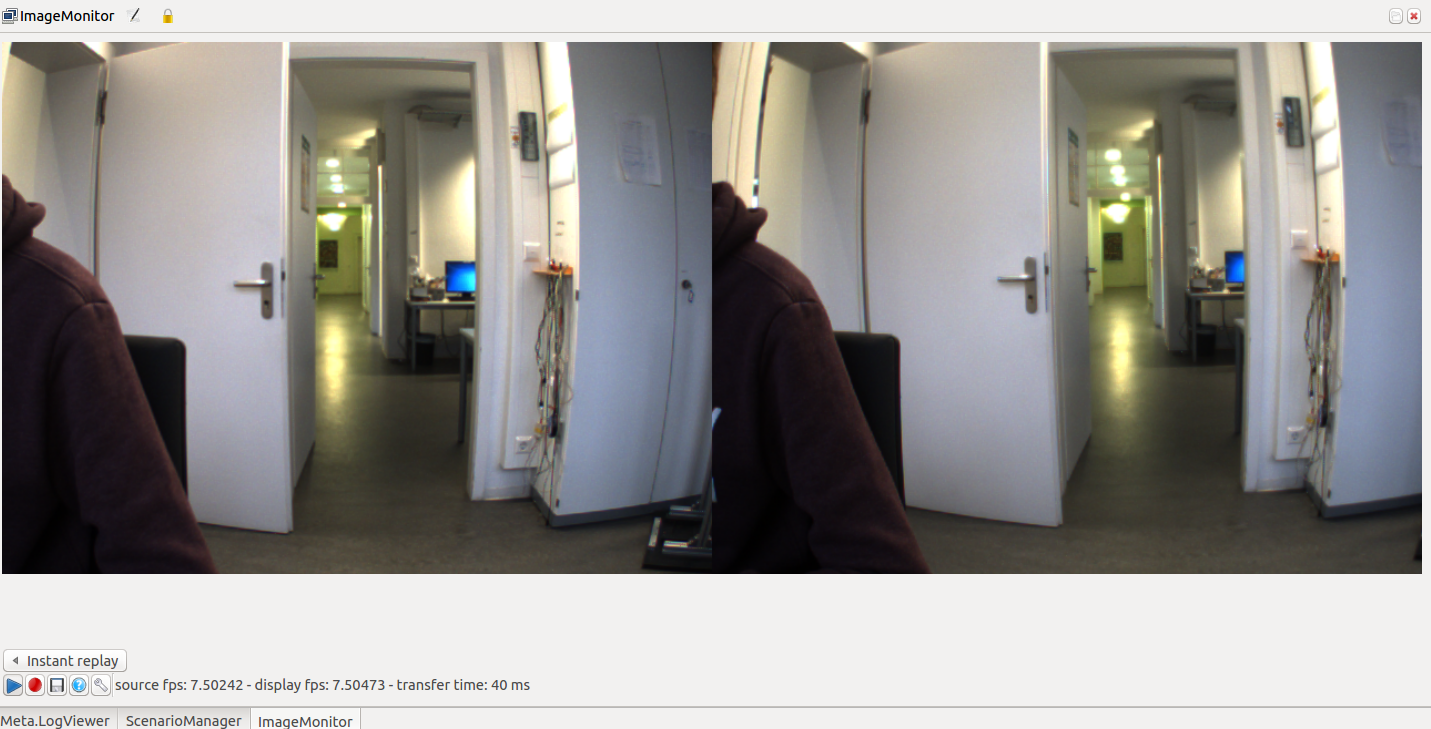
To make sure that the scenario is running, add the ImageMonitor widget to the gui. After clicking on the settings button, the proxy named IEEE1394ImageProvider should be available and after confirming, the two live images from the wide cameras should be displayed.
Troubleshooting problems
Starting Ice on one computer and using it on others may in certain cases lead to problems. Generally, it is advised to perform all "armarx" and "armarx memory" starting/stopping operations only on the armarx head pc. If Ice is creating problems try to use armarx killIce to stop the current Ice nodes. If Ice wont start again / is throwing error messages that aren't resolved using armarx killIce/reset, deleting the contents of ~/.armarx/icegridnode_data/ may help to be able to start Ice again. Be aware that this should only be done after making sure Ice is in fact not running anymore (using armarx killIce). Similarly, if armarx memory start/repair is not working because a file is locked, deleting this file may be able to solve the issue.
If the camera images cannot be accessed, make sure the firewire connections are setup correctly. If the images are still not showing, it might be because of lacking access rights to the firewire connections. You need to have acccess to the folders /dev/fwX where X is a number from 0 to 4.
