Table of Contents
Objective: Learn how to create an ArmarX skill.
Previous Tutorial: Create a "Hello World!" Component in ArmarX (C++)
Next Tutorial: Using Parameters of Skills via ARON
Reference Code: skill_tutorials
- Note
- If you are conducting this tutorial as part of the robotics practical course, we have prepared a workspace for you. In your workspace, you will find the folder
robotics_practical_course/exercise_robot_development_framework_armarx, in which you should create theskill_tutorialspackage as described in the tutorial. You can verify this by checking the environment variablesskill_tutorials_DIRandskill_tutorials_PATH(echo $skill_tutorials_DIRandecho $skill_tutorials_PATHin the terminal). They should point to the build directory and the source directory of your package, respectively. Those variables are crucial in ArmarX to find the package. If you are not conducting the tutorial as part of the robotics practical course, you can also create the package in any other workspace. Just make sure to adjust the paths accordingly, and to set the environment variablesskill_tutorials_DIRas described below_axii_env_set ....
Create a new ArmarX Package
Open a terminal and create a new package:
- Note
- If you are conducting this tutorial as part of the robotics practical course, you will find the folder
robotics_practical_course/exercise_robot_development_framework_armarxin your workspace. You should create theskill_tutorialspackage in this folder.
The output should look something like this:
Create a new ArmarX Skill
A skill in ArmarX involves a skill library as well as a skill provider.
In case you wonder what the purpose of all these different things is, and why it is not included all-in-one:
- On a structural level:
- The
skill frameworkin ArmarX is a way of implementing functionalities, so that they are easy to use in other code and via a GUI. It is the abstract overall name for skill-related things in ArmarX, and can be seen as an interface and a common way to structure code. - A specific
skillis a certain functionality, e.g., making the robot say hello. In the "skill manager GUI", available skills are listed. A "skill" is also a term on the implementation level, see below. - On an implementation level:
- It might be that we want several instances of a skill to run in parallel. In some cases, they may re-use the other instances' dependencies, or in contrary, may need to be configured in a way that they do not interfer. Thus, we do not instantiate skills directly by calling their constructor, but use a
skill providerfor creating skill instances (like a factory). This skill provider is an ArmarX component. It should do as few things as possible, i.e., be limited to creating the skills. - The term
skill libraryrefers to organizing C++ code in libraries - it is the C++ library that belongs to the skill implementation. You might think of it as a subfolder or built target, defined to improve the code structure. - Finally, a
skillis a class that contains the code to provide your functionality in the manner of the skill framework. It is usually- located within a skill library and
- registered in a skill provider and
- mentioned (e.g., regarding its name) in certain code files
- The actual logic of your functionality is preferably not implemented in the skill itself, but in its
core. The core should be independent of the skill framework, and rather be regular objects and functions that use plain C++ (and ArmarX) types. This makes it easier to re-use your functionality also outside the skill framework, and to adapt it when there are changes of the skill framework itself.
Let's first create a new skill library with the name say_hello:
The output should look something like this:
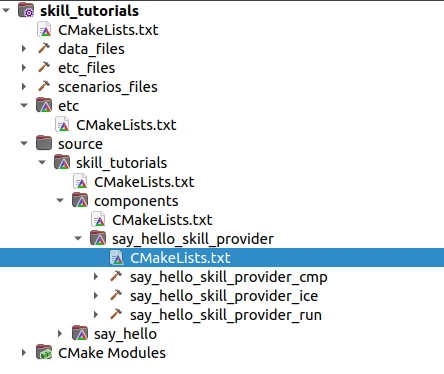
Take a look at everything that has been created in the source folder.
There is a new folder named say_hello. If you open it, you can see 5 subfolders: aron, constants, core, skills, test.
- In the
aronfolder you find a fileSayHelloParams.xml. In this file, the set of parameters used by your skill is defined as an aron type. Representing these data by an aron type allows to easily transmit them over the network, e.g., from a GUI to the skill provider. - In the folder
constants, all the constants used in the skill are defined. - In
core, most of the functionality should be implemented. Implementing your code in a plain C++ library, rather than inside the skill itself, makes it easier to re-use it in other parts of ArmarX, or potentially even outside of it. - In the
skillsfolder you can write all the code that is needed to connect the skill with the skill_provider. - In the
testfolder, code tests can be added.
Next we create the skill_provider, which is implemented as a component, and that can be used to call the skill from the ArmarX GUI.
The output should look something like this:
Let's also take a look at what has been created here:
In the components folder there is a single folder say_hello_skill_provider. Inside of that you find all your normal component files. If you don’t remember what these are all for you can take a look at the previous tutorial Create a "Hello World!" Component in ArmarX (C++). But basically here you just add the skill and later maybe define a remote GUI.
Hello World
Now you should open the package in your IDE. We will be using QtCreator, but you can use any IDE you want.
Go back to your package's root directory and start QTCreator from the terminal:
When QtCreator is ready, select 'Open Project' and choose CMakeLists.txt to open the project:

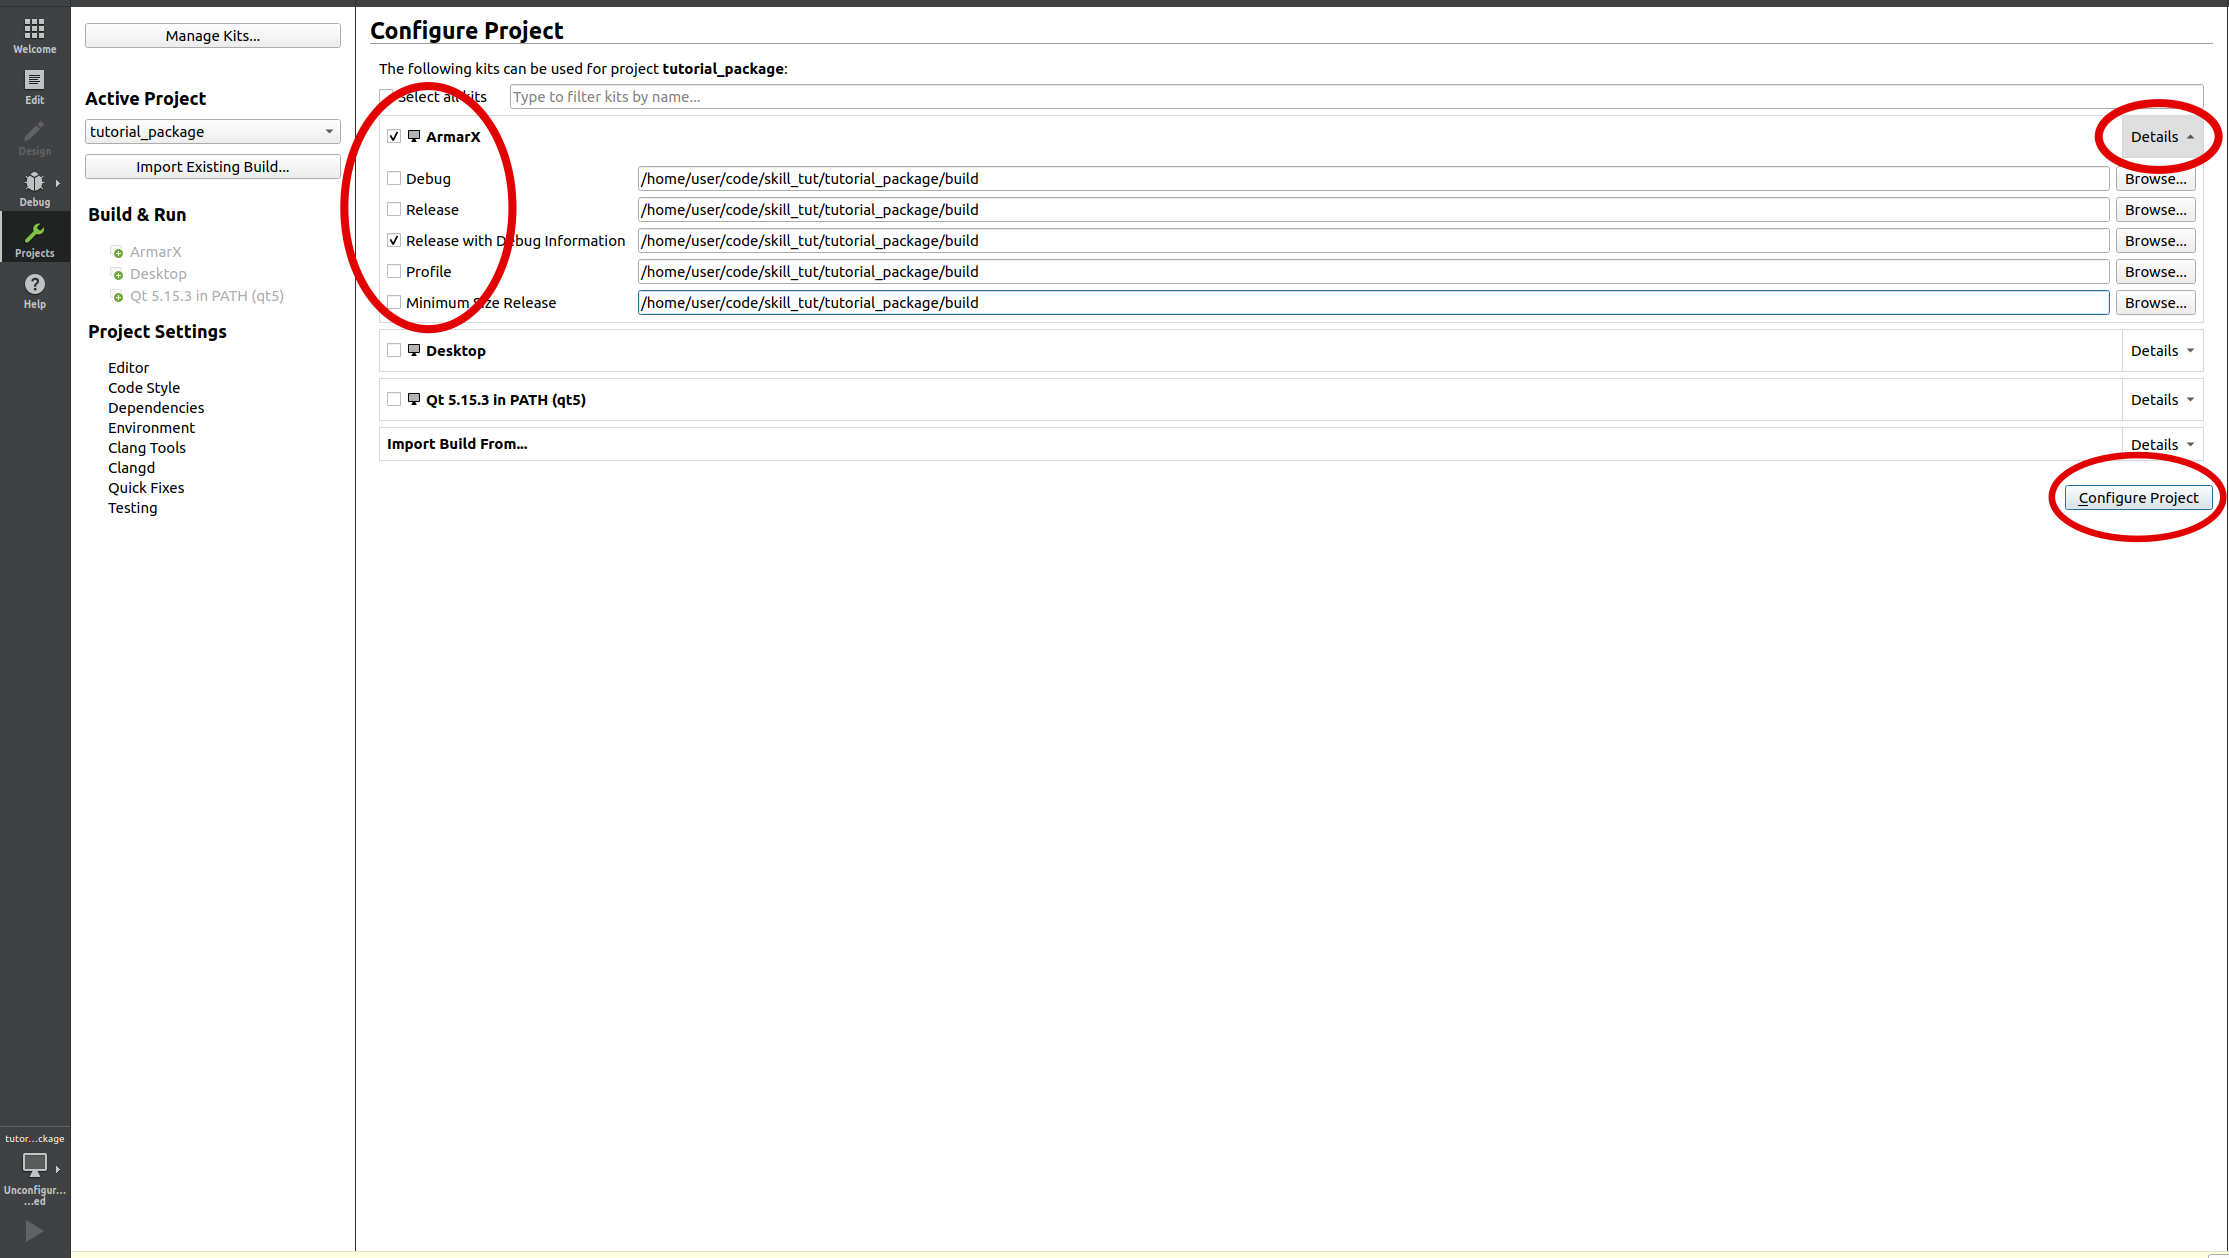
Afterwards, choose the following configurations as the project's configuration and click Configure Project to continue:
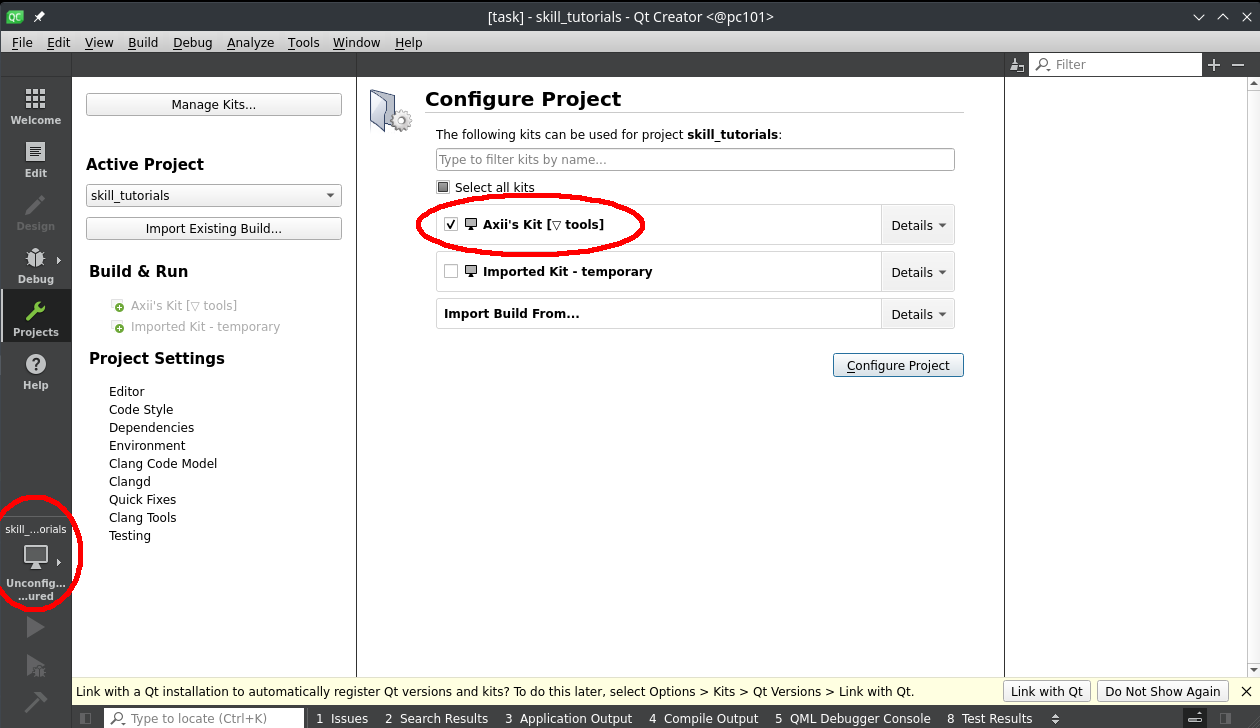
- Note
- At the lab PCs, the configuration kit you need to use is called
Axii's Kit
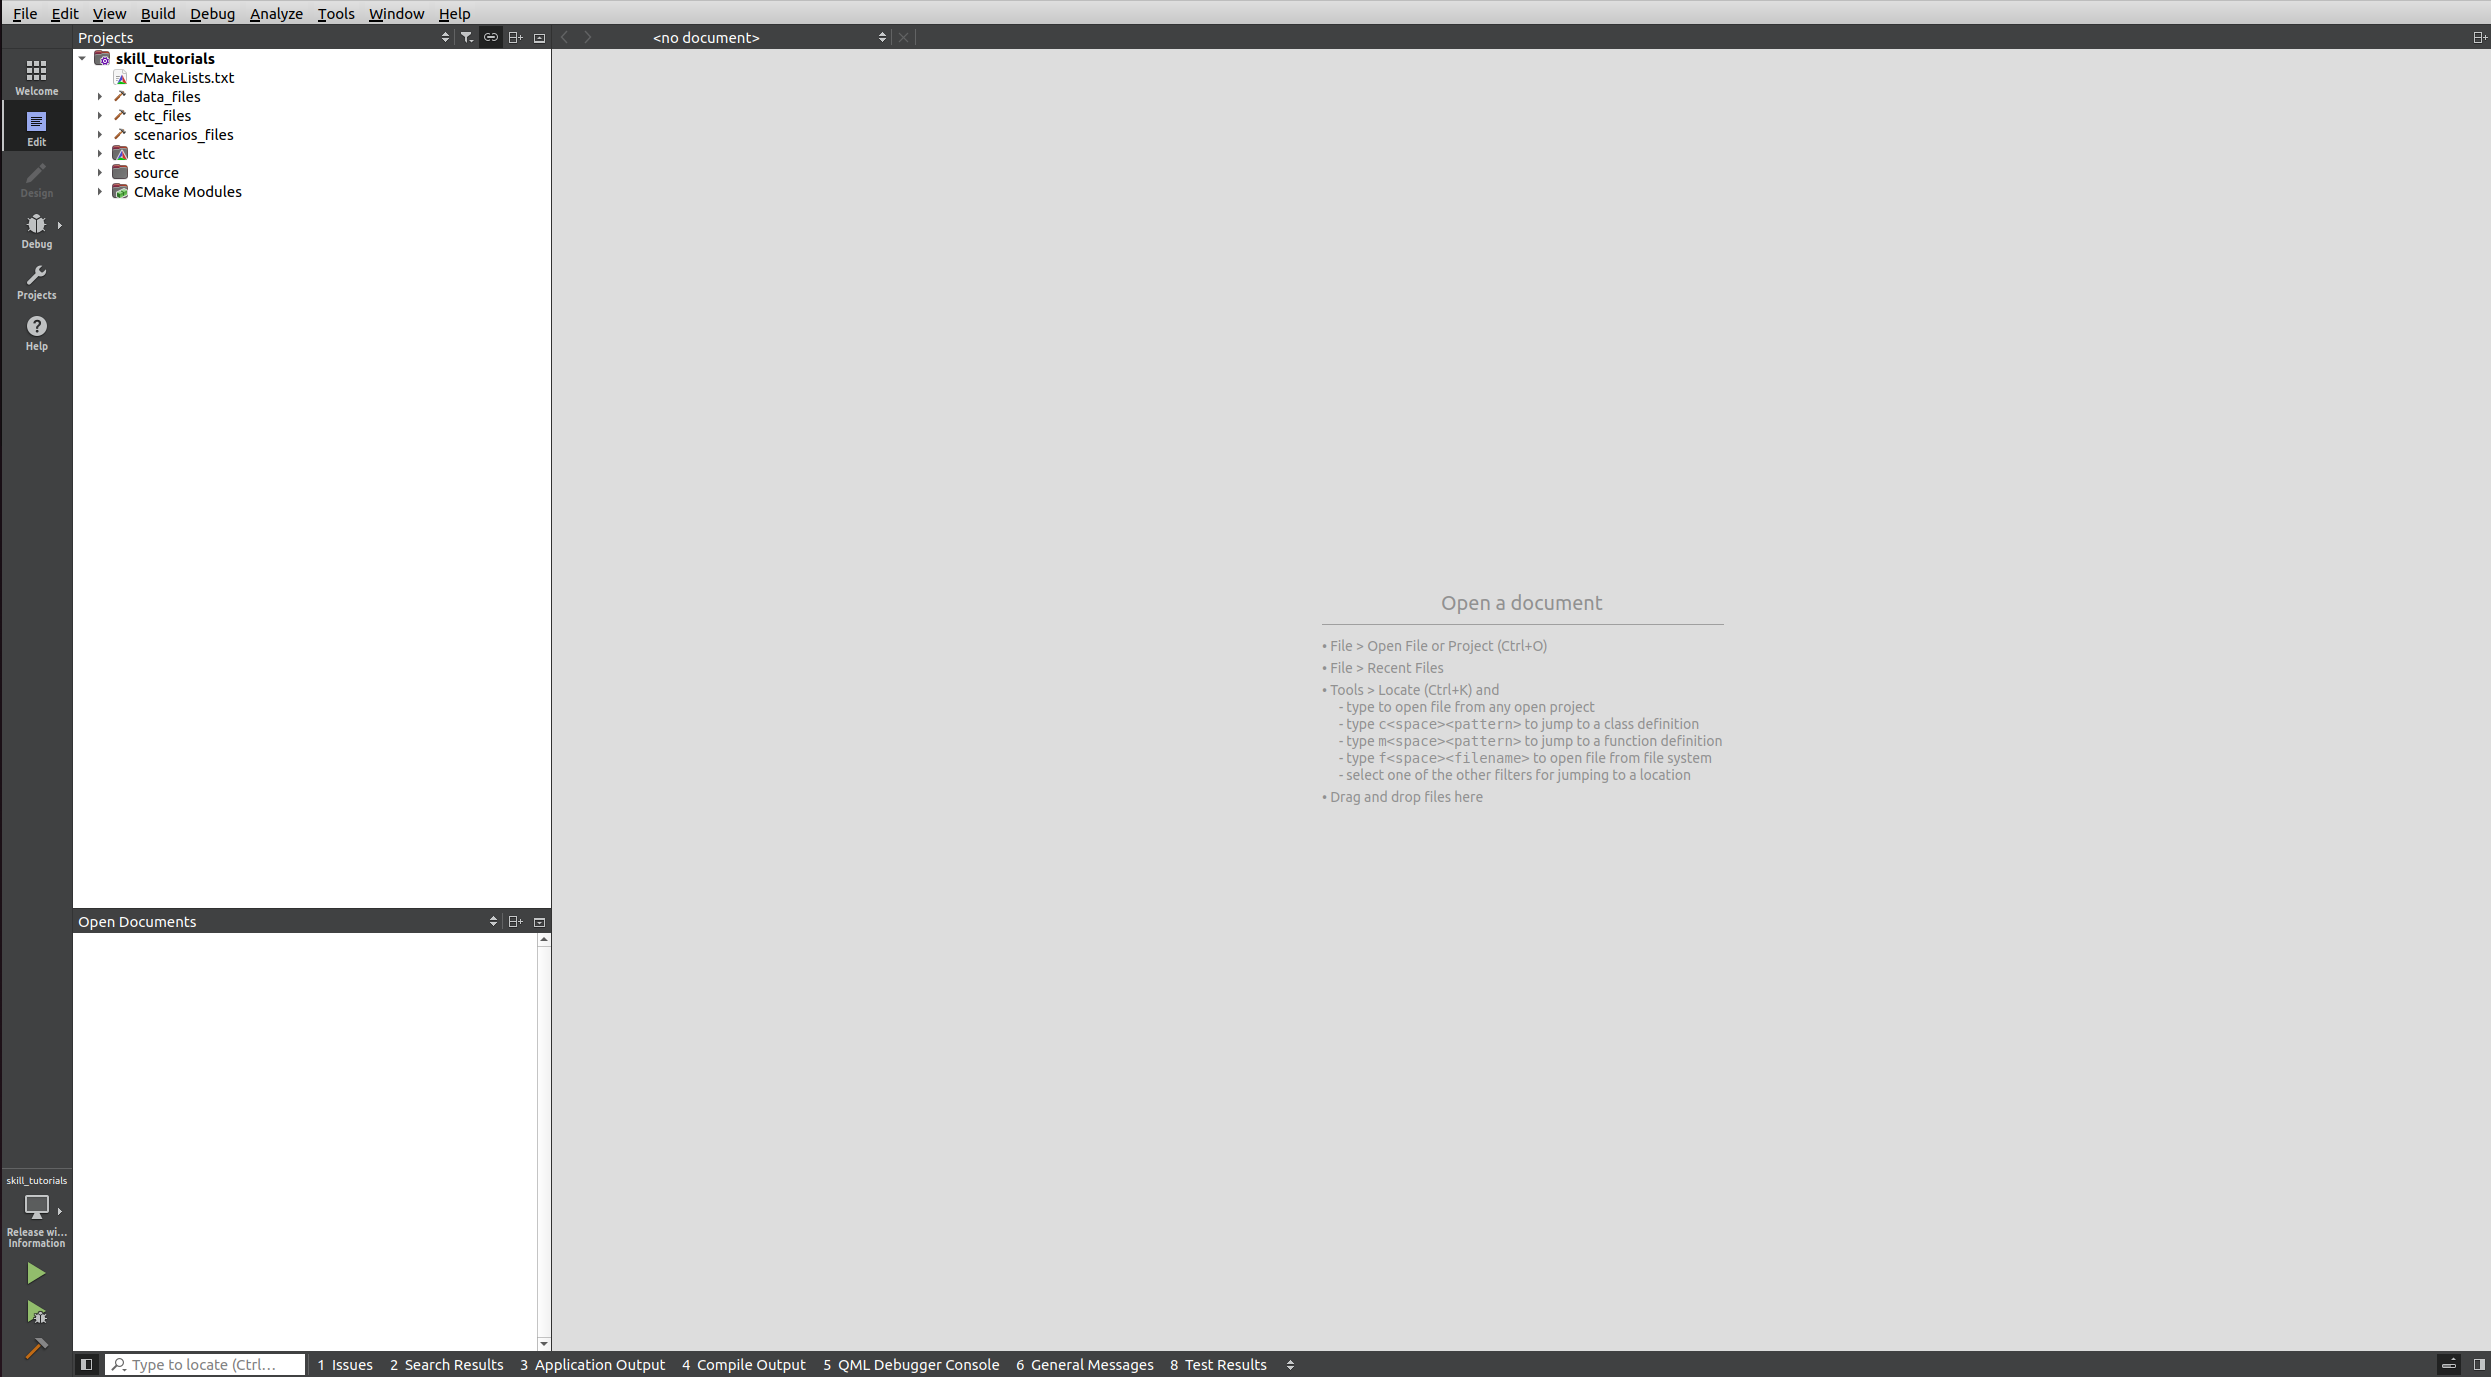
You should now see the following:
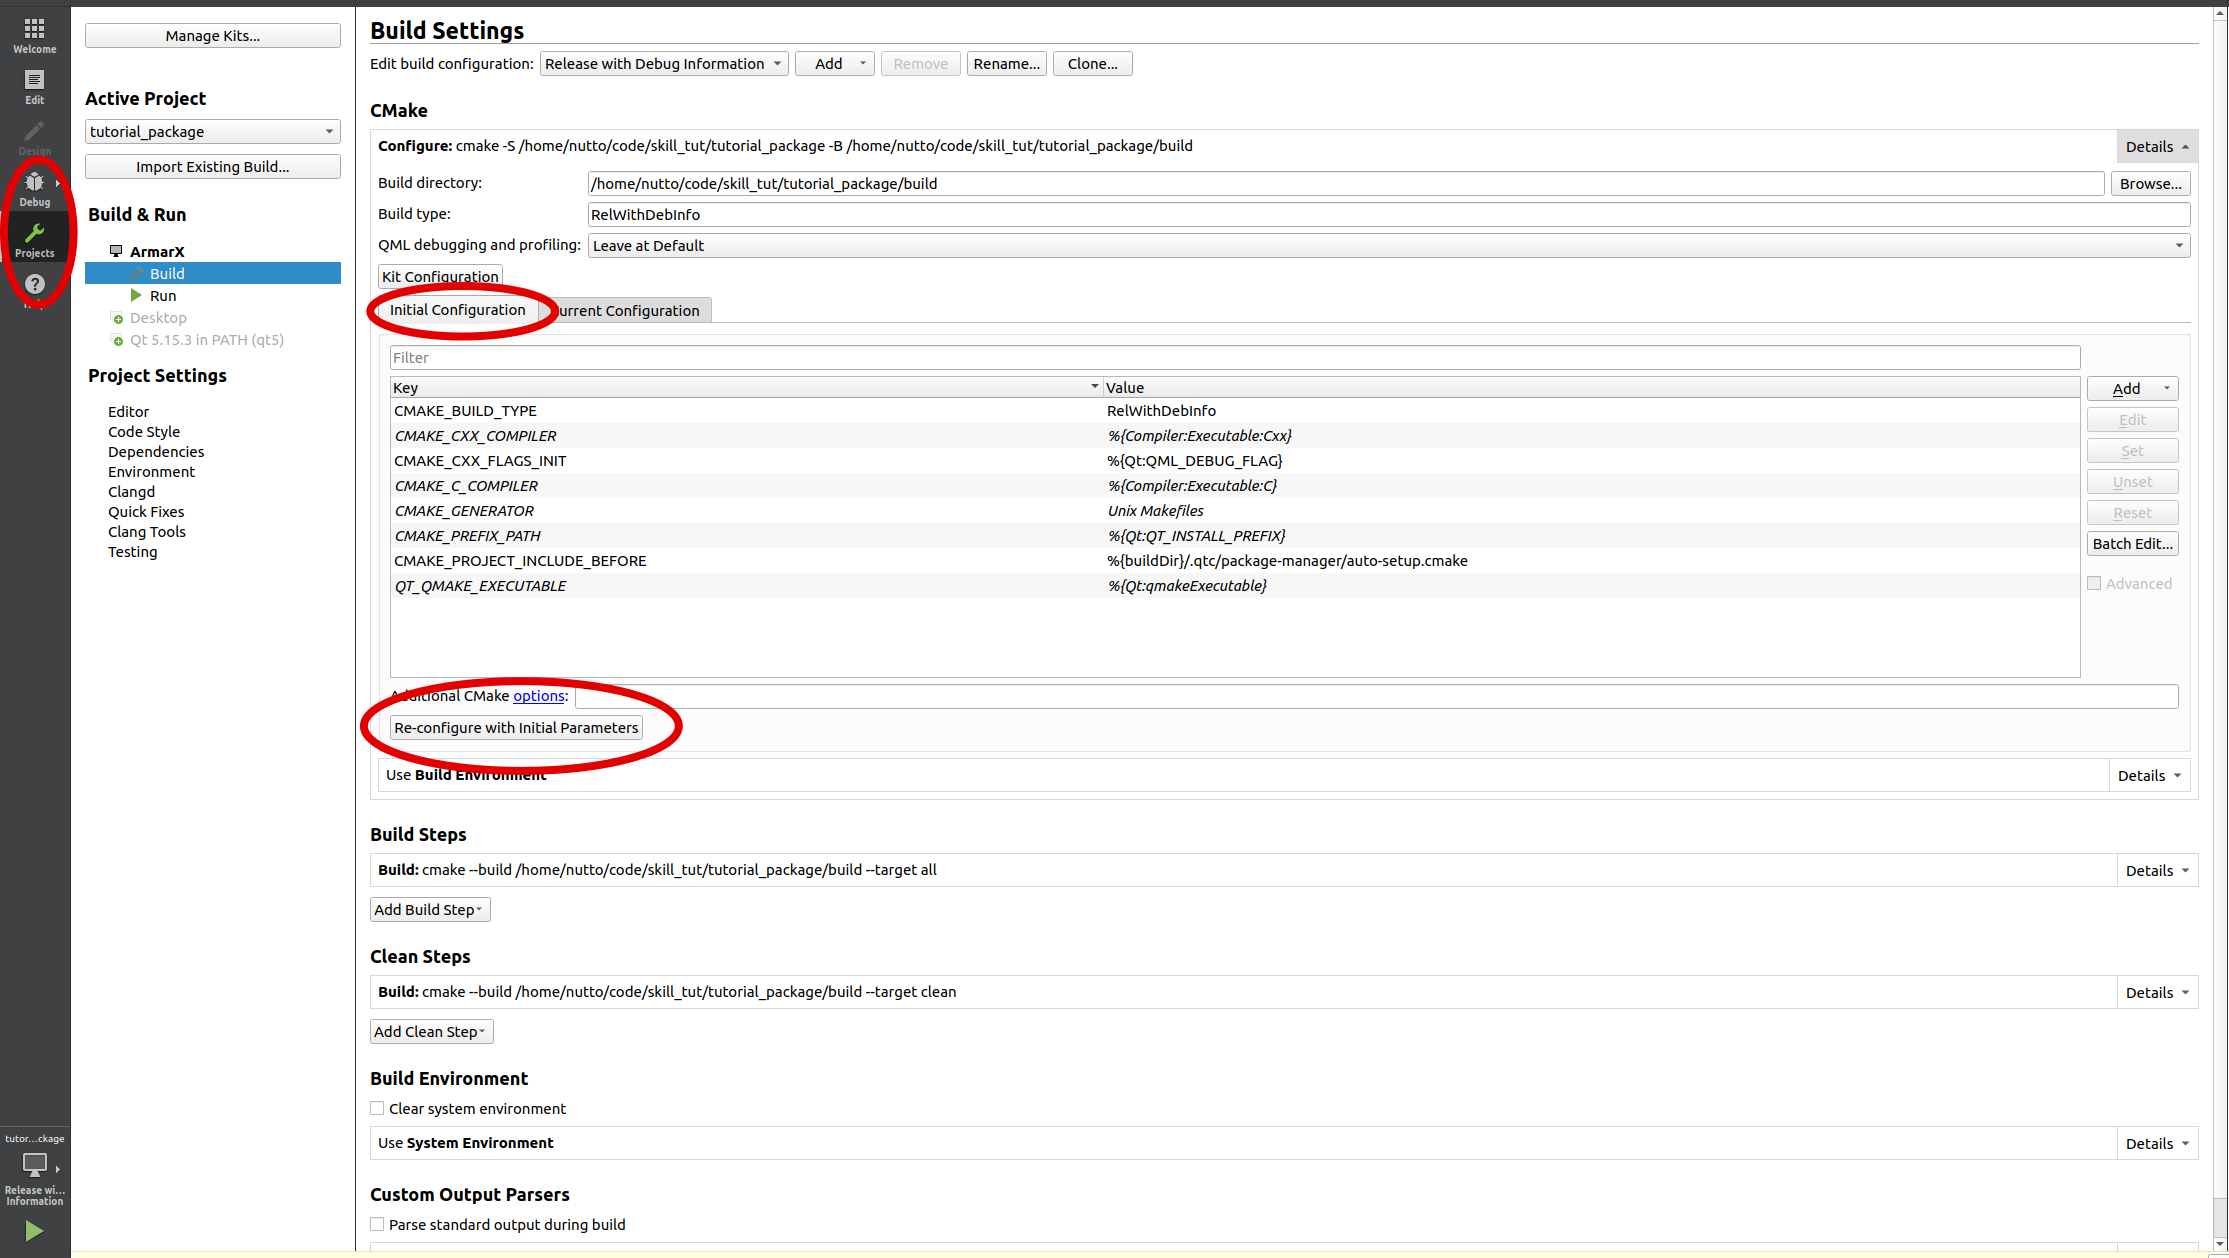
- Note
- In case the project tree doesn't show the files, go to
Projectsand selectre-configure with initial parameters:
Firstly, open the top level CMakelist.txt file and uncomment the following line.
CMakelist.txt:
This is because the skill framework depends on code which is part of the RobotAPI built target.
Next, we want to build the project once so all the autogenerated aron files will be created. But before we can actually built the project though, we need to do two things: tell Cmake that we've created a new skill library and make this library known to our skill provider.
Therefore go to the CMakelist.txt file of the say_hello_skill_provider and add skill_tutorials::say_hello_skills to the dependencies:
CMakelist.txt:
To make the skill library known to the skill provider we need to include it in the source file Component.ccp of the say_hello_skill_provider. You'll find it here: 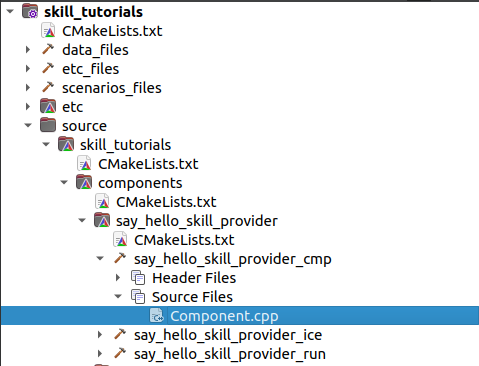
Now add the following to Component.cpp:
Component.cpp:
You can build the project now by clicking on the hammer symbol in the left bottom corner or simply press CTRL + B
Make the Skill Do Something
Now we want to have our skill do something. As mentioned before, the functionality itself goes into the core. So let's open the cpp file there and add a print "Hello World!", using the built-in ArmarX logger.
- Note
- In ArmarX, when we want to print something, we use the build in ArmarX logger, not the c++
coutfunction of the iostream library. This is because the ArmarX GUI provides a log viewer, printing the information directly to the GUI instead of an additional terminal.
In case you wonder why there is both an execute() and an _execute() method: Externally, we want to call an execute() method; i.e., the name should be written as expected. However, before we actually start the execution, we need to do some auxiliary things (here: locking the execution mutex to prevent threads running parallel from changeing an object in the memory at the same time, causing confusing behavior). As we do not want these auxiliary actions to clutter our actual implementation, we move the latter into a second method. This can be private, and we differentiate it from the first one by prefixing it with an underscore - i.e., we call it _execute(). The execute() method is now basically a wrapper around _execute() and cares about all auxiliary things that need to be done.

core/SayHello.cpp:
After adding everything to your code, build your project again (press CTRL+B). Okay, great! Then let's see if we can start the skill in the ArmarX GUI.
Create a New Scenario
Firstly, you need to make the path to the build directory of your package known to ArmarX. For that, append the following lines to the armarx-workspace.rc file, which you can find in the top level directory of your current workspace.
- Note
- If you are conducting this tutorial as part of the robotics practical course, you can skip this step, as the path to the build directory of your package should already be set in the
armarx-workspace.rcfile of the provided workspace. You can verify this by checking the environment variableskill_tutorials_DIR(echo $skill_tutorials_DIRin the terminal). It should point to the build directory of your package.
Open your files and navigate to your workspace directory and open armarx-workspace.rc and simply add:
armarx-workspace.rc:
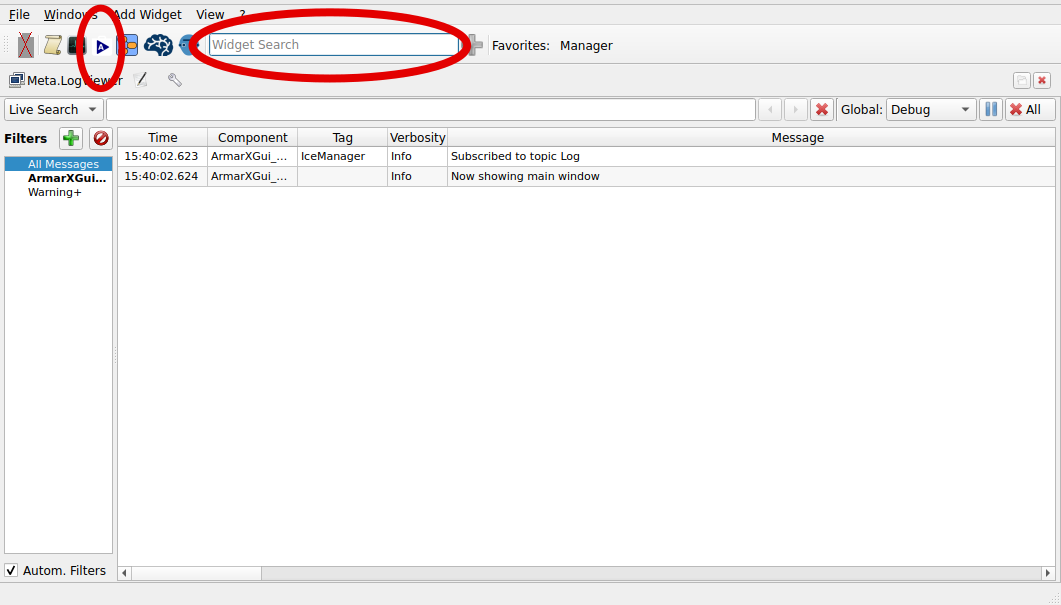
Now start ArmarX and open a GUI, both from the terminal.
What you are now seeing on the GUI is the LogViewer, where we can see all the different messages logged by the system. Next, open the ScenarioManager by clicking on the ScenarioManager icon or simply search for it in the Widget Search.
Open your package (skill_tutorials) by clicking on Open Scenario followed by Open Package and entering the package name.
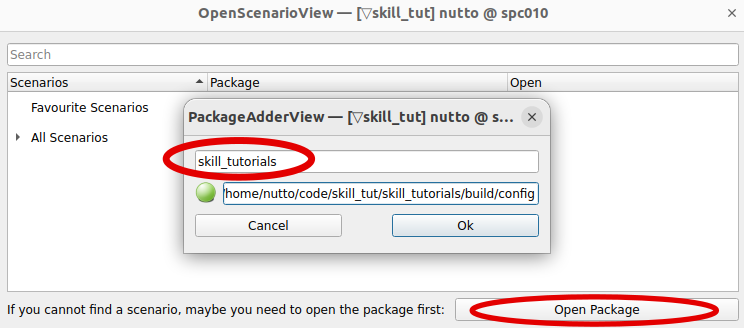
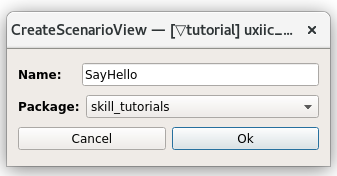
Then, create a new scenario, give it a name, and select the correct package.
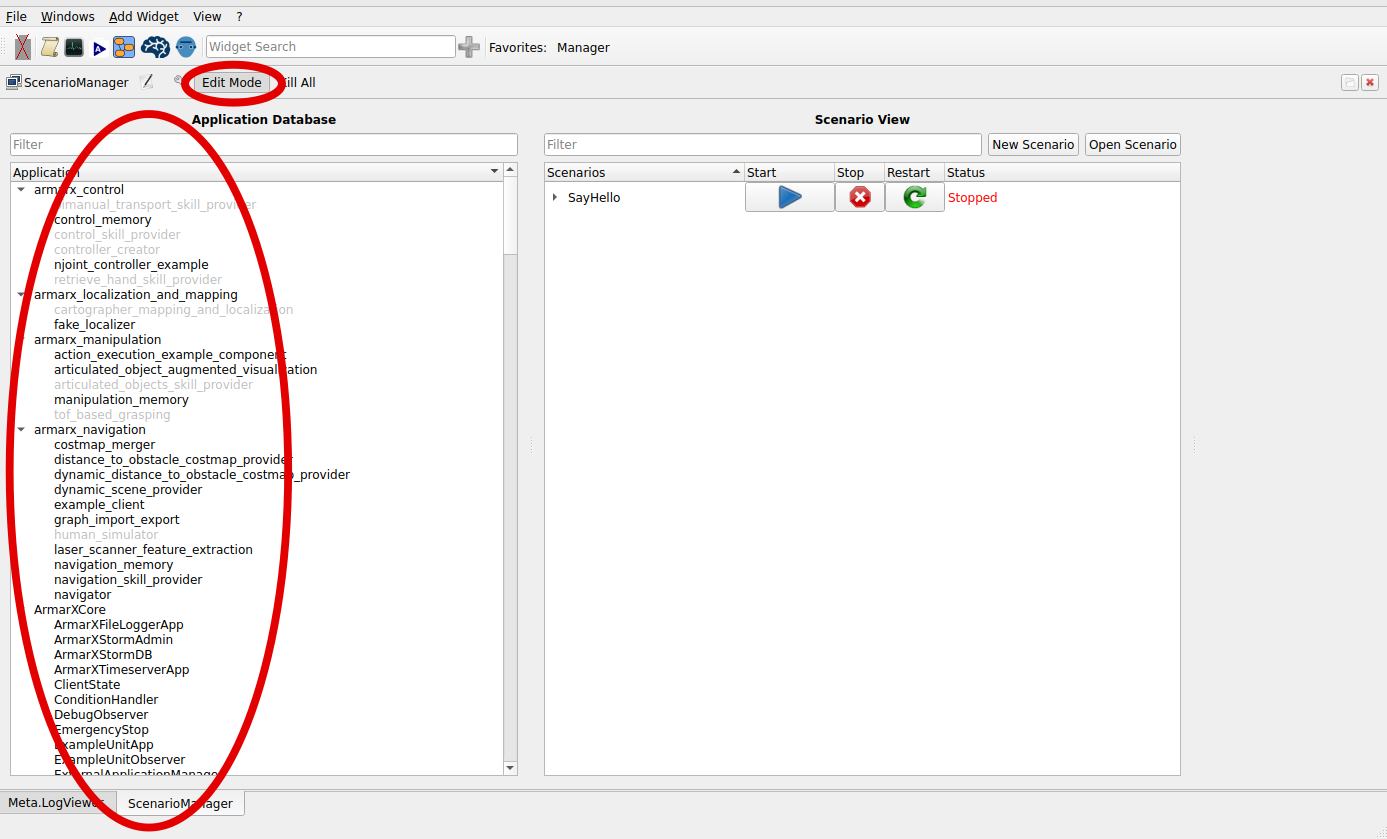
Any skill needs the SkillsMemory, MemoryNameSystem and the RemoteGUIProviderApp to be able to run. So add all these apps to your Scenario by clicking on Edit mode and drag the needed apps into the scenario. Don't forgett to also add your say_hello_skill_provider.
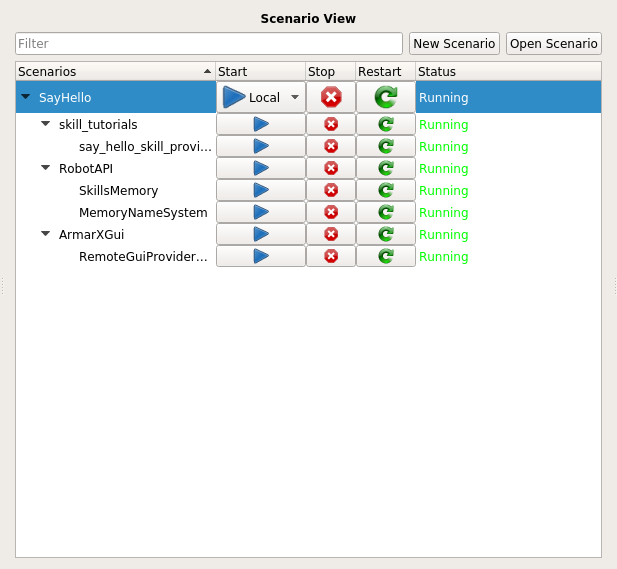
Start the scenario by clicking on the blue play button of your SayHello scenario.
Now open the Skills.Manager. To do so, you can search it in the Widget Search. As the proxy, SkillMemory should already be selected.

You also may want to open the Meta.LogViewer next to it, so that you can see both. Simply go to the Meta.LogViewer tap, grab the window and drag it to the left side of the GUI.
If you click update on the top left of the Skills.Manager, you should see your skill_provider appear. If you expand it, you also see the skill say_hello. In case you implement multiple skills in the library they will all appear there.
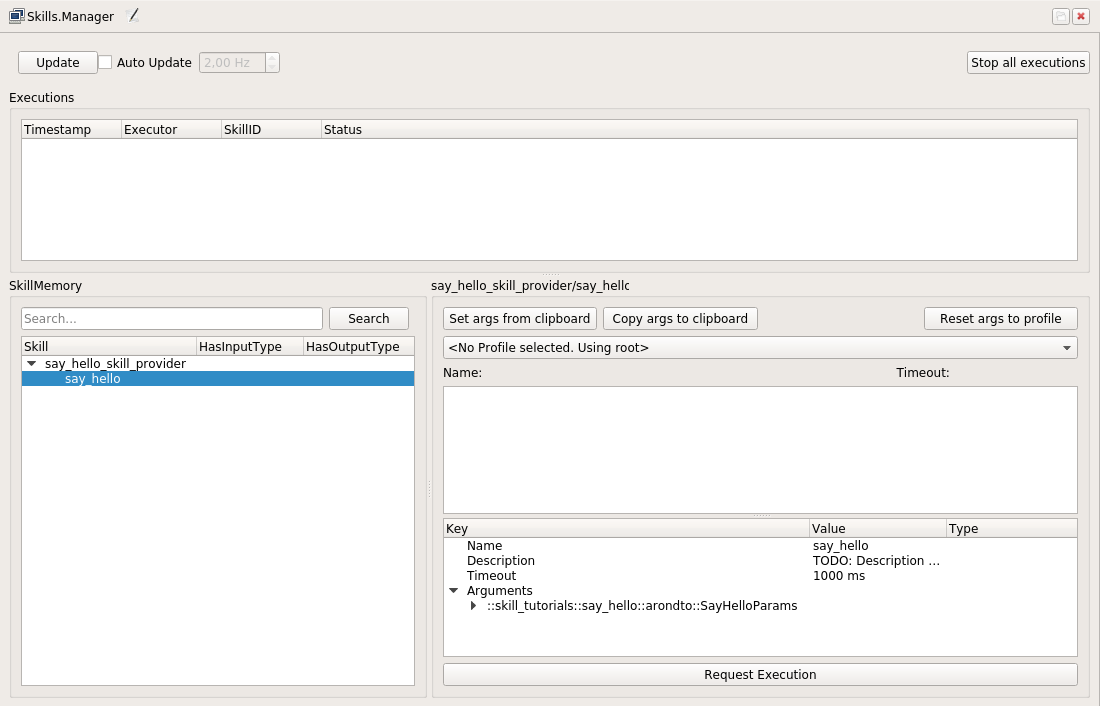
Now is the time to say hello! You can click on the skill and request the execution. Take a look at the LogViewer, you should see the message you have sent. Congratulations!
