Table of Contents
Objective: Explore ArmarX from a user perspective: Learn how to use the GUI to interact with the ARMAR-III simulation.
Previous Tutorials: Explore ArmarX (I): Start the ARMAR-III Simulation
Next Tutorials: Beginner Level of Tutorials
In this tutorial, we will use the GUI and its different widgets to interact with the ARMAR-III simulation. Many of these tools will come in handy for you at some point or another, so it is good to know what is out there before you dive into your own project.
Start the ARMAR-III Simulation
If you haven't already, start the ARMAR-III simulation. If you do not know how to do this, have a look at the previous tutorial. In any case, here is a summary:
- Open the ArmarX GUI (run
armarx guiin a terminal) - Open the scenario manager (Add Widget > Meta > ScenarioManager)
- Open the scenario "Armar3Simulation" (in the package "ArmarXSimulation")
- Start the scenario "Armar3Simulation"
You should then see something like this:

In the following, you will have a look at and try out different basic GUI widgets that you can use to view and interact with the system.
- Note
- A GUI widget is one part of the ArmarX GUI in its own frame that you can drag around and resize. From a technical perspective, new GUI widgets are added to the ArmarXGui via GUI plugins. However, for the most part, the terms "GUI widget" and "GUI plugin" can be used interchangeably, although they are technically a bit different.
Control the Robot
First, we will see some basic ways of how we can control the robot, i.e. make it move.
Move the Platform using the Platform Unit GUI
First, we will drive the robot around in the room by controlling its platform. For this, we can use the platform unit GUI. You can open it in two ways:
- As for the scenario manager in the last tutorial, you can navigate through the menu: Add Widgets > RobotControl > PlatformUnitGui. But do not do that now.
- See that text box saying Widget Search, with the gray + symbol next to it? You can search for any GUI widget there. Try it now by entering "platform" into the widget search:

Navigate to the search result (RobotControl.PlatformUnitGui here), using the arrow keys or select it using the mouse. When the + sign turns green, ...
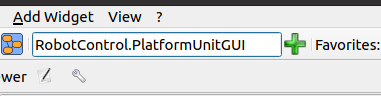
... click on it or press Enter.
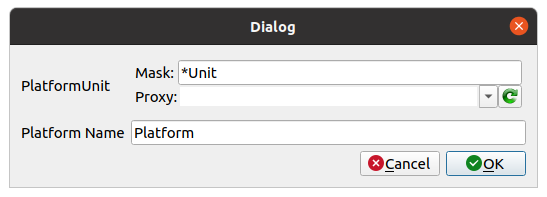
Before the platform unit GUI opens, though, this dialog pops up:

This is a configuration dialog: It allows to specify a few settings for the opened widget. This is most often used when the widget requires a component running in the background (a component is an application communicating in ArmarX, more on that later). In this case, the platform unit GUI requires the platform unit, which is a component that directly controls the robot's platform. So the platform unit GUI communicates with the platform unit, which in turn sends motor commands to the hardware. Anyway, the dialog lets you specify which platform unit the GUI should communicate with. In this case, there is just one platform unit, so the correct name (Armar3PlatformUnit) is already filled in.
Should you ever see a dialog like this:
 A configuration dialog where the components where not found.
where the "Proxy" field is empty, it usually means the required component is not running
(e.g. if you did not start the simulation yet), so you need to start it first.
Finally, press OK to open the platform GUI. Move it around, so you can see both the simulation and the platform GUI.
Here's a small tip: You can right-click on the title bar of the simulation viewer (or any window in Ubuntu), and press "Always on Top" so keep it above the other windows, even when it looses the focus.
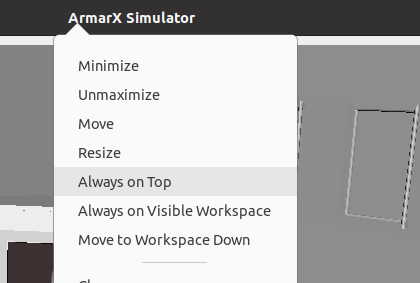 Context menu to set the windows to be always in top.
Press with the mouse inside the area of the platform unit GUI to give it the focus. Then, you can use WASD (yes, like in an action game) to drive the robot around. Use Q and E to rotate the robot. If the default velocities are too small, feel free to pump them up a bit. How about 1 000 mm/s for direction (translational velocity)? And 2.0 rad/s for orientation (rotational velocity)? Go now, have fun for a moment!
After playing around for a bit, try to navigate the robot to the global coordinates (x, y, theta) = (2700, 6800, 1.54).
- Note
- Distances, translations and positions are measured in millimeters (mm) in ArmarX and Simox. Rotations are measured in radians (rad).
You have no idea what the robot's current pose is? Switch over to the other tab, Platform Position Control:
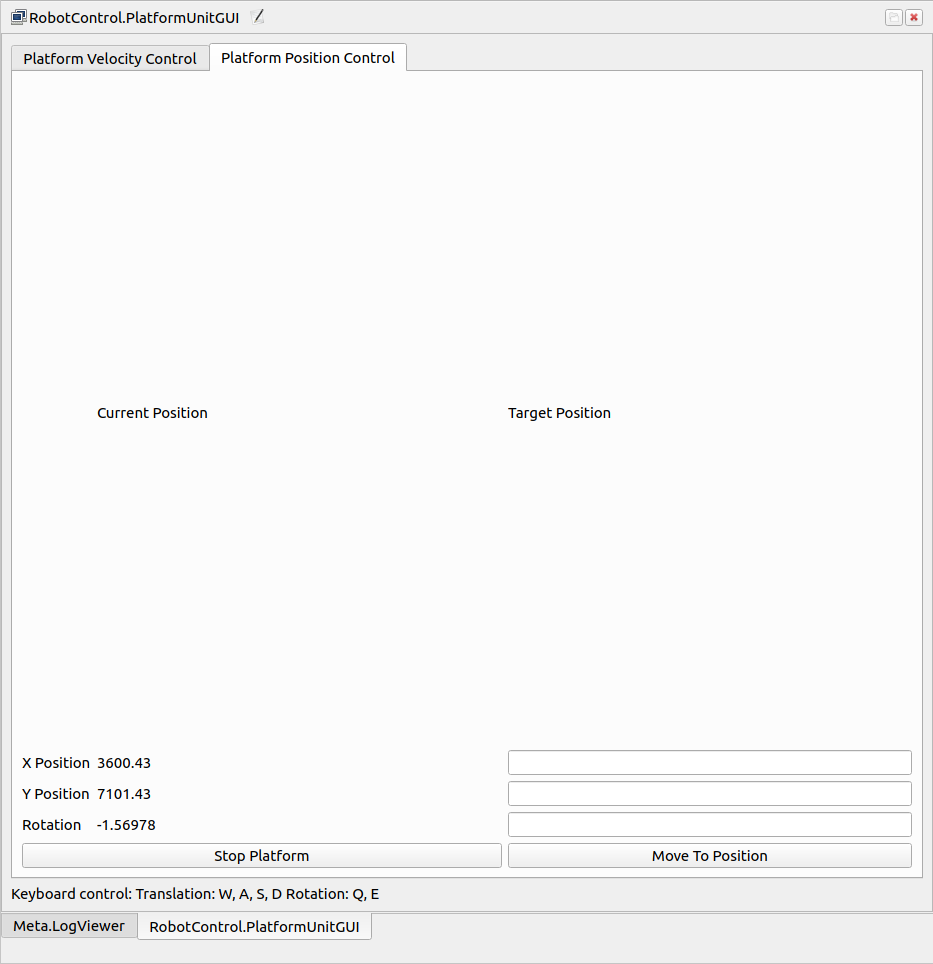
It shows the robot's current global pose (position + orientation) in the lower left corner. You can still drive using WASD + QE. So try to drive the robot roughly to the specified coordinates now.
Last but not least, you can tell the robot to drive to a specific pose directly. In the Platform Position Control tab, in the lower right corner, you can enter your desired coordinates. Enter different coordinates, e.g. (x, y, theta) = (3500, 9000, 0.70), and press Move to Position.

Watch how the robot moves to the target pose. It drives on a straight line to the goal, while simply rotating itself until it has the desired orientation. Importantly, it does not avoid collisions with any obstacles in the environment. So, keep in that this is a very low-level way of controlling the robot: It will just execute the commands without further thinking. If you want to avoid collisions, you need to plan a paths around obstacles, which is out of scope of the platform unit.
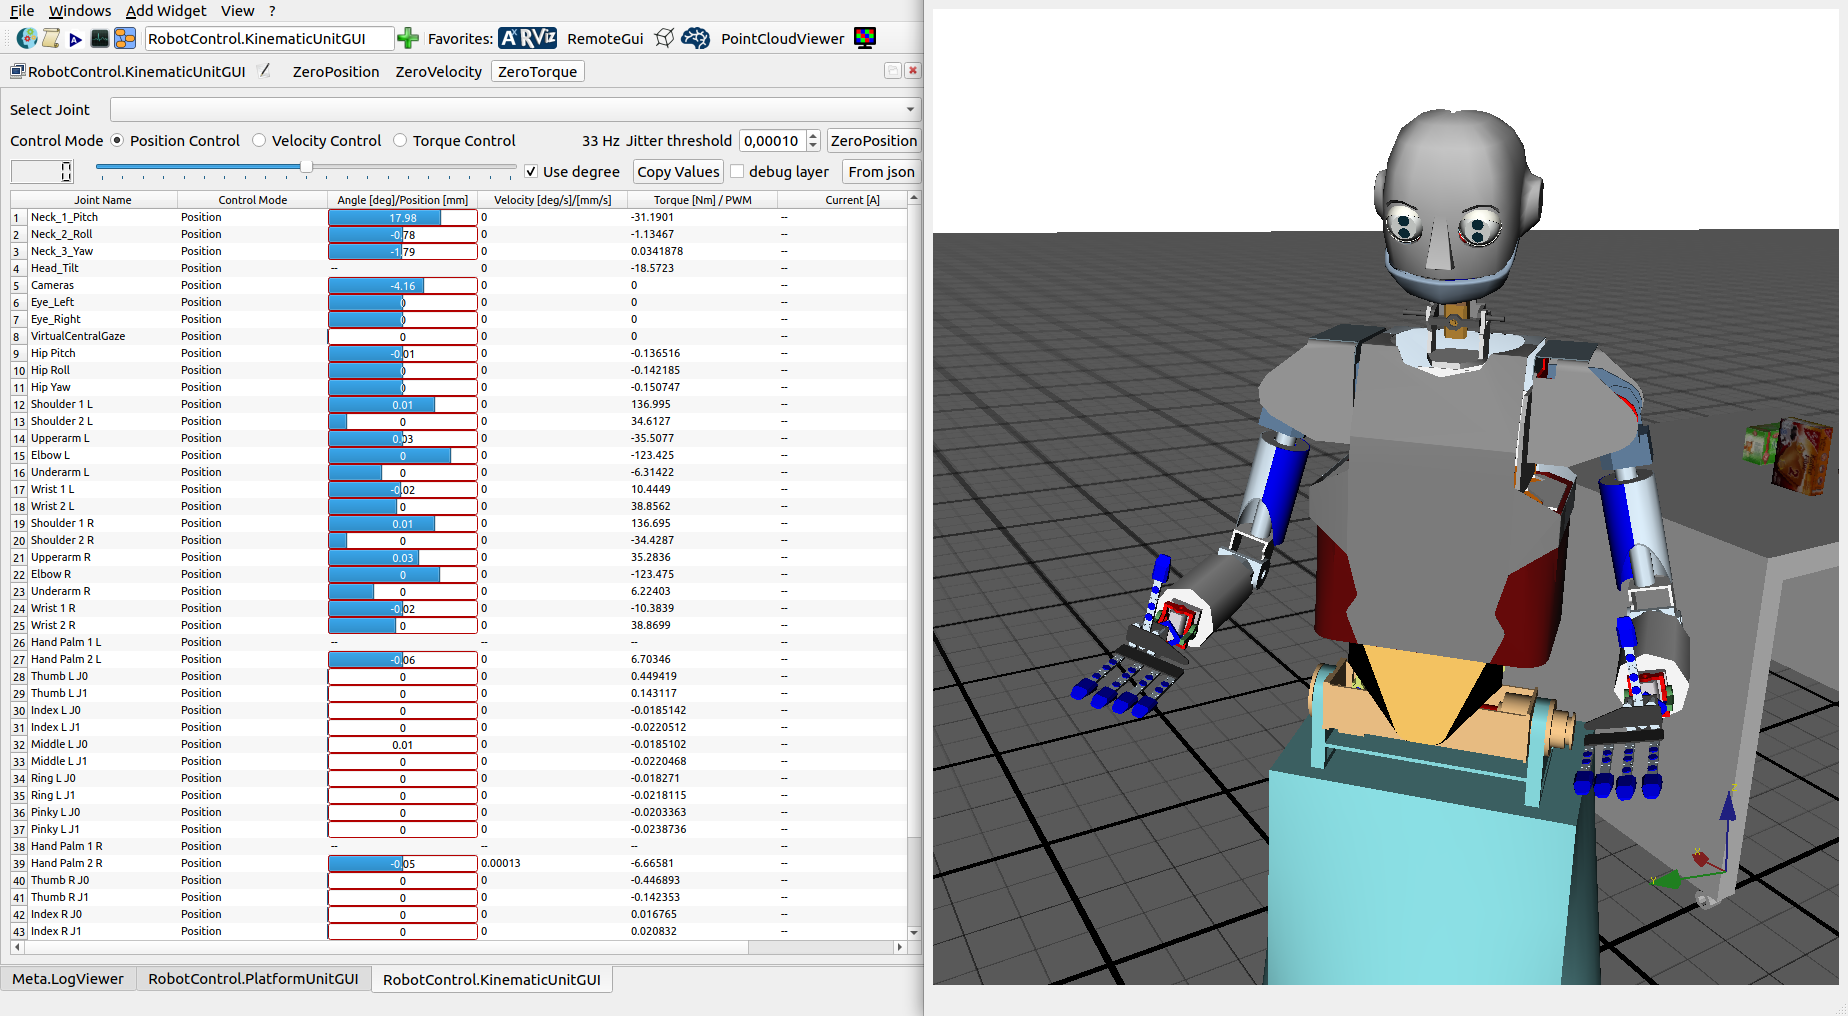
Move the Joints using the Kinematic Unit GUI
So, the first basic way of moving the robot is moving its platform. The second basic way is moving its joints. To move the robot's joints directly, we can use the kinematic unit GUI.
You can open it as any other GUI widget. Just as a reminder, that means
- either, navigate through the menu: Add Widget > Robot Control > KinematicUnitGUI,
- or search for RobotControl.KinematicUnitGUI (just type "kinematic") in the widget search and press enter or the green + sign.
Move the camera in the 3D view to get a good view of the robot (feel free to move the robot a bit using the platform unit GUI if necessary).
The kinematic unit GUI shows you all joints of the robot, along with their current control mode, position/angle, velocity, etc. When the simulation is running, you can see angles wobbling around a bit. This is because the robot's virtual motors are working against gravity to keep their position. This is also indicates by their control mode "Position".
For the start, let's move the robot's head. For this, we can control the neck joints of the robot. ARMAR-III has three of them: Neck_1_Pitch, Neck_2_Roll, and Neck_3_Yaw. Pitch lets the robot look up and down, yaw makes it look left and right, and roll makes it tilt is head sideways. Let's make the robot nod, so we need the Neck_1_Pitch joint.
- Double-click on the line of Neck_1_Pitch to select this joint.
- Then, use the slider to move the joint from 0 degrees to 30 degrees.

Watch the robot while you control the joint: Its head should move down. Move the slider around a bit to get a feeling for how the head moves when you change the joint's position. Move it up and down to make the robot nod. Fun, isn't it?
Try moving another joints, by double-clicking it, then moving the slider. Go through the different joints, move them and watch the robot to see where the joint is on the robot.
Bonus exercise: Can you make the robot wave with its right hand?
There is More
ArmarX offers a variety of GUI widgets (aka GUI plugins) for different purposes and uses cases. Covering all of them here would take ages, so we will stop here. However, feel free to explore the ArmarX GUI as well as the GUI Plugins page.
Next
Great! Now that you have familiarized yourself a bit with ArmarX from a user's perspective, you can continue with the beginner level tutorials to learn how to develop components for robot applications in ArmarX.
